DIY Tutorial: Freestanding Table Lamp with Fabric Covered Diffusers
- Aug 19, 2025
- 5 min read
Table lamps are more than just practical - they’re a chance to make a style statement. Whether you’re drawn to bold patterns, soft textures, or something in between, this unique freestanding table lamp project gives you the freedom to craft a high-end, completely fabric-covered table lamp that’s both functional and chic.
In today’s blog tutorial, we’ll walk you through making two stylish fabric covered diffuser options - circular or die cut - which will softly, diffuse the glow from your DIY freestanding table lamp, creating the perfect ambient lighting for any space. And with easy-to-follow instructions, you’ll be lighting up your space with a lamp that’s totally your own.

What you'll need to make a Table Lamp
1 x 20cm Lamp Making Ring Set (plain ring and utility ring with 40mm legs and feet)
1 x Self-Adhesive Lampshade Making Panel - 200mm diameter x 250mm high (available in 4 heights)
Fabric covering measuring 68cm long x 29cm high
Clean, flat working area
Seam roller (optional)

What you'll need to make a Matching Fabric Covered Diffuser
20cm Lampshade Diffuser - Translucent polypropylene OR 20cm PVC Lampshade Diffuser (see below for the different styles)
22 x 22 cm fabric to match your Table Lamp ( see below for diffuser fabric requirements)
1 x metre of Textile Self Adhesive Film
Pencil
Ruler

How to Make a Bespoke Freestanding Table Lamp
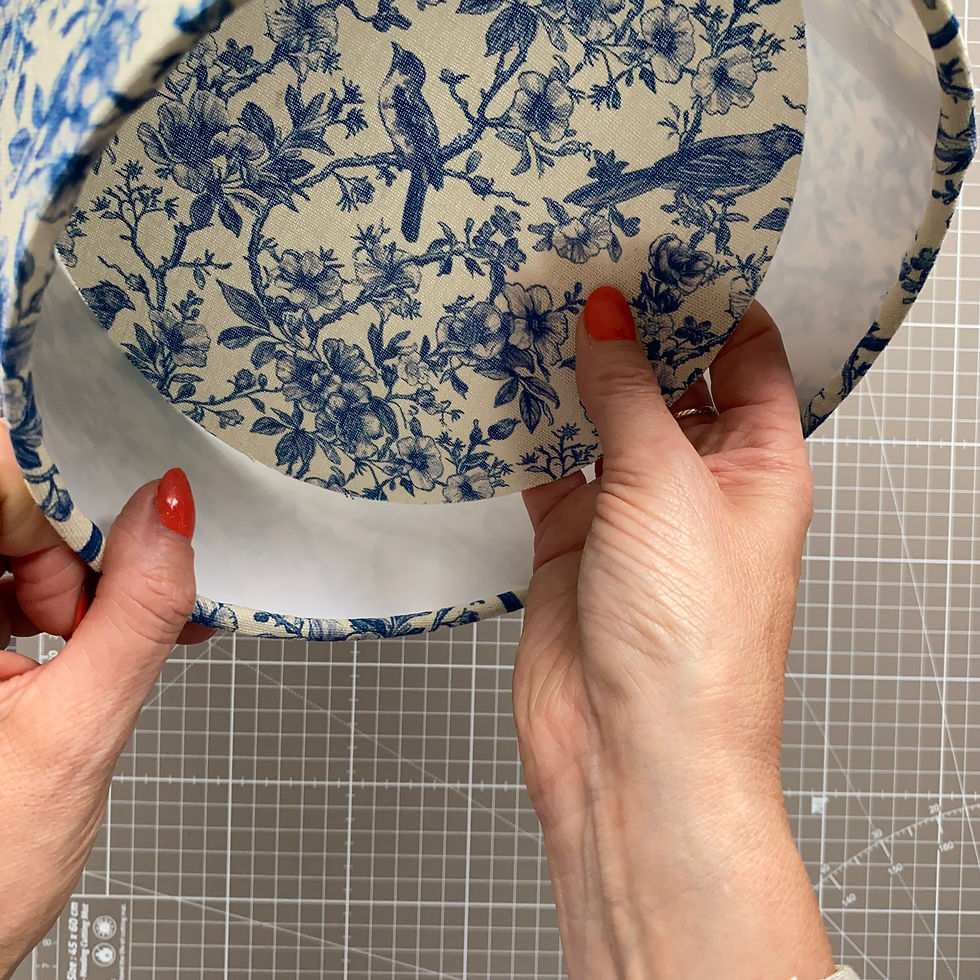
To make your Table Lamp, from our lampshade making materials, follow the tutorial in our DIY Tutorial - How to Make a Bespoke Freestanding Table Lamp.
We chose a 20cm diameter Lamp Making Ring Set, yet the beauty of making your own bespoke lamp is that you can choose the diameter based on what you feel will suit your space. It's important to note that you will need the same diameter diffuser, to match the ring set.


What’s is a Diffuser?
A diffuser is a lightweight disk, that usually sits in the bottom of a pendant lampshade, i.e., those hung from the ceiling, which serves two purposes: to prevent glare from the bulb, creating a softer and more widespread light and to hide the bulb, resulting in a more aesthetically pleasing finished lampshade.
Our diffusers are either translucent polypropylene (not transparent or see through) or opaque with a die cut hole in their centre, made from Foamex or PVC. Alongside our classic diffuser styles, we also have a range of cut outs designs, including an intricate flower pattern, a traditional louvered design and fun stars!
For this tutorial, we’re switching things up and positioning the diffuser, covered in a matching fabric, at the top of the Table Lamp to help you to achieve the clean, contemporary Table Lamp look, to match the fast developing interior trend.

Making a Fabric Covered Translucent Polypropylene Diffuser (Solid Circle)
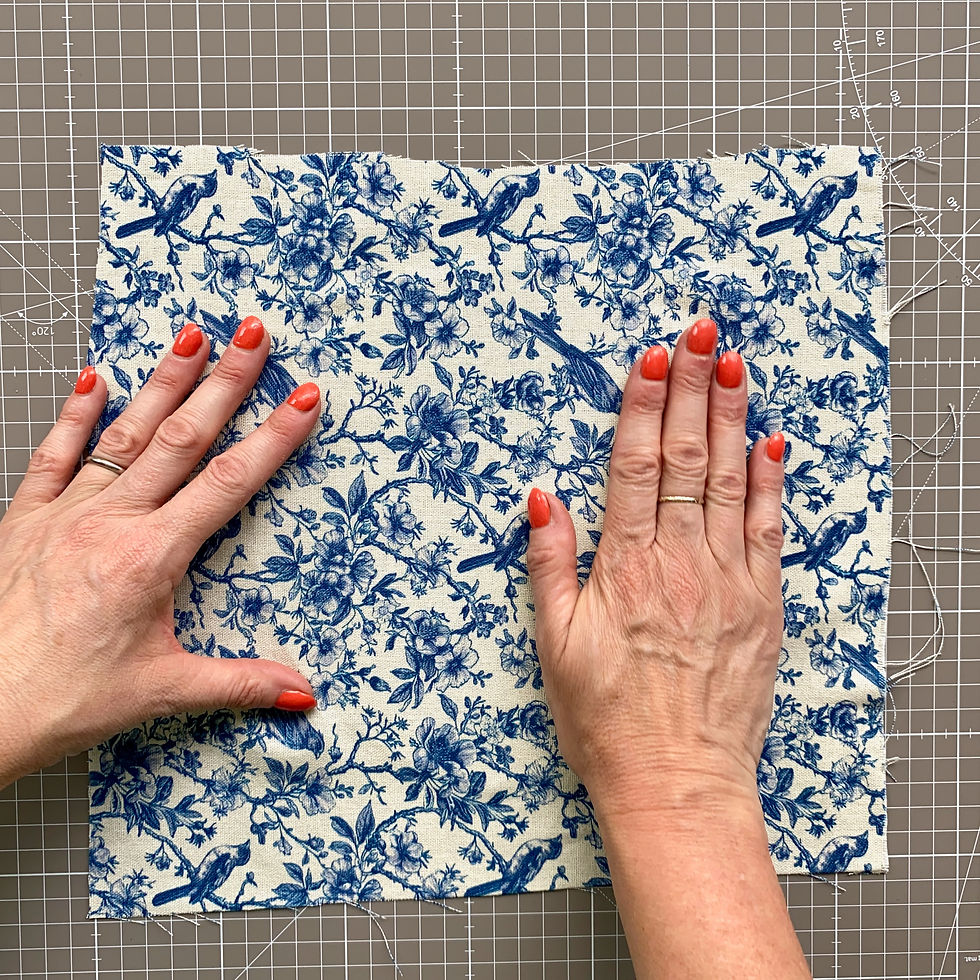
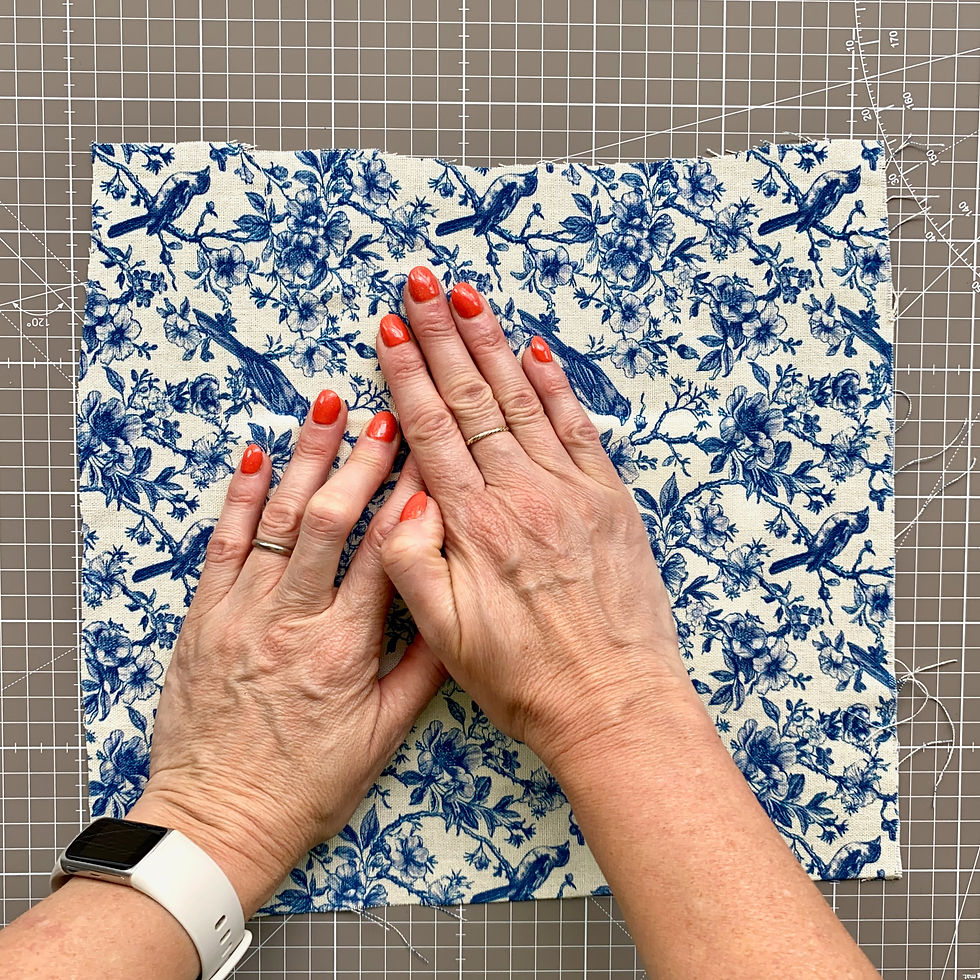
1.Iron your fabric removing any creases and place face down on a clean, flat surface.
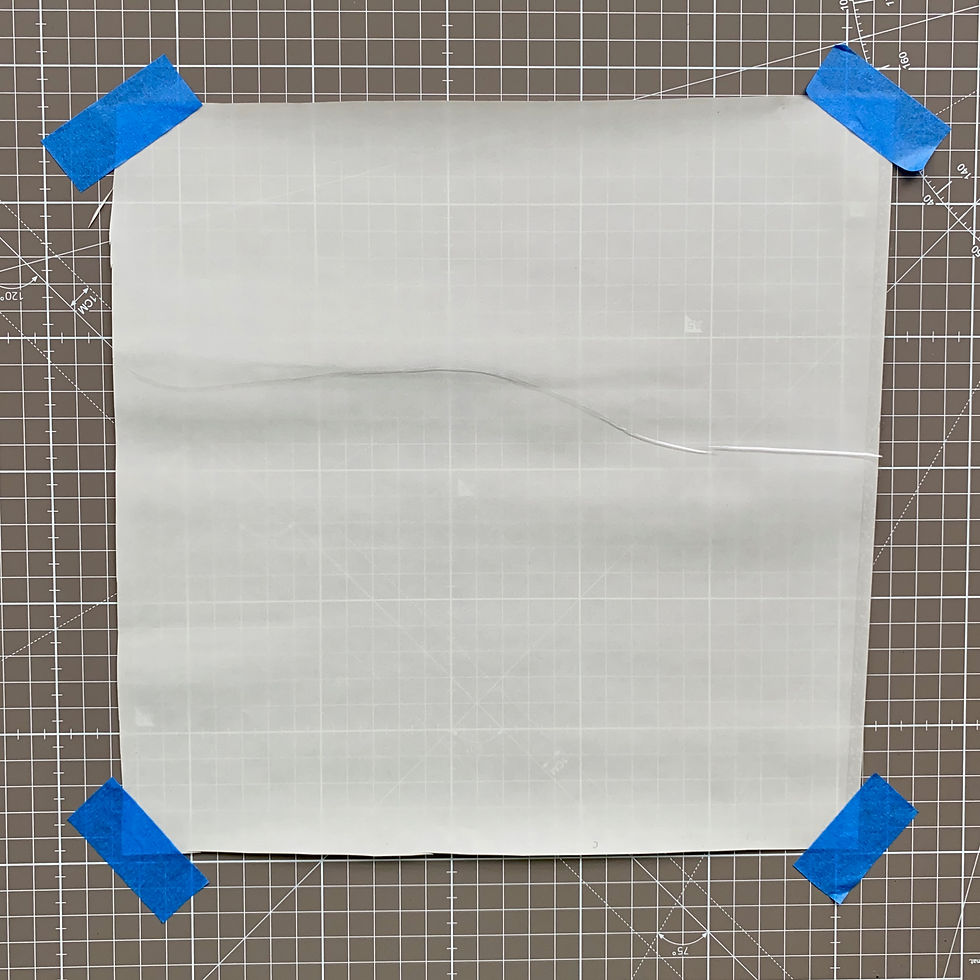
2. Unroll the Textile Self Adhesive Film and cut to roughly 2cm wider than your diffuser. The film is extremely high tack, so we found it easier to secure this to our surface using pieces of masking tape in each corner, with the tacky side of the film facing up.
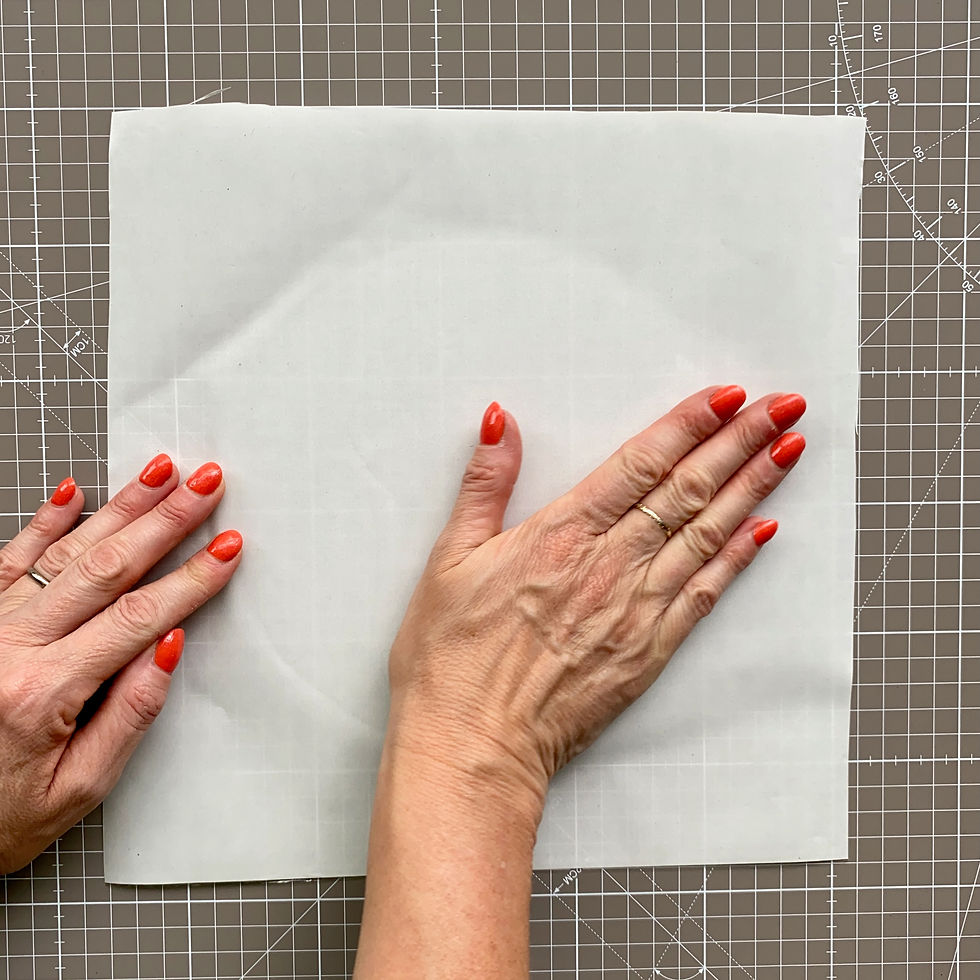
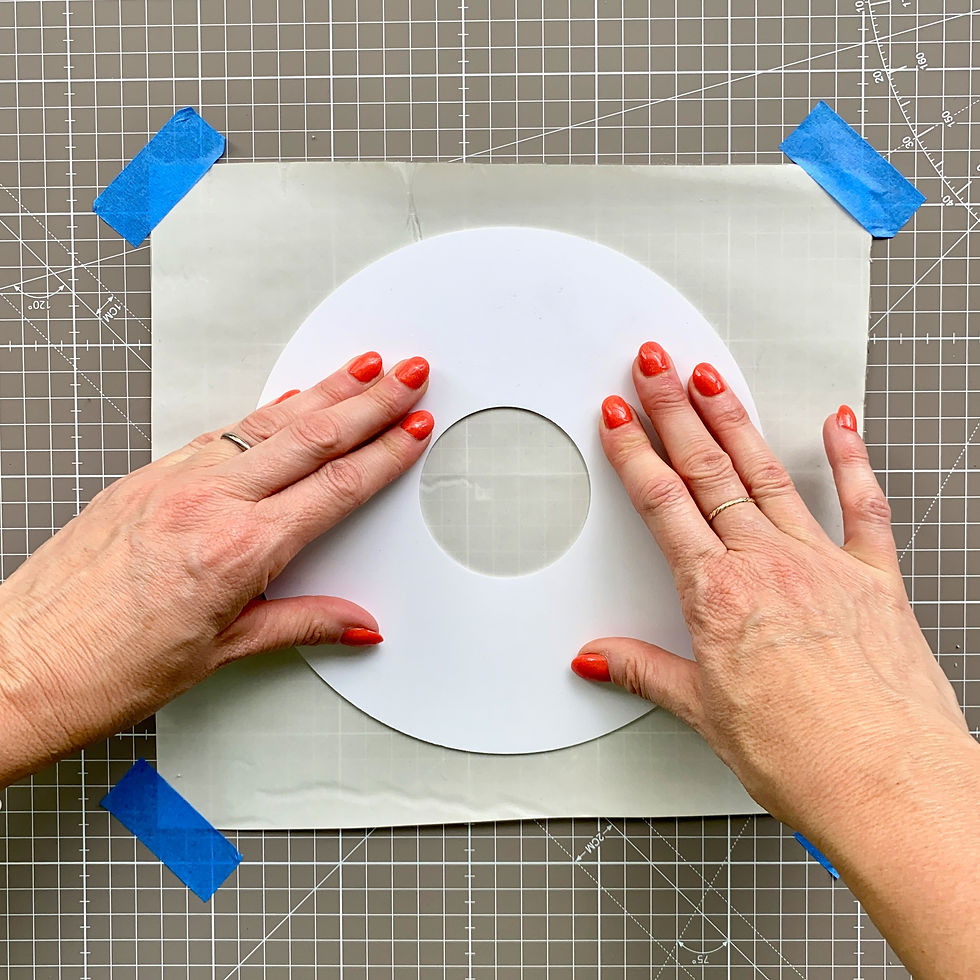
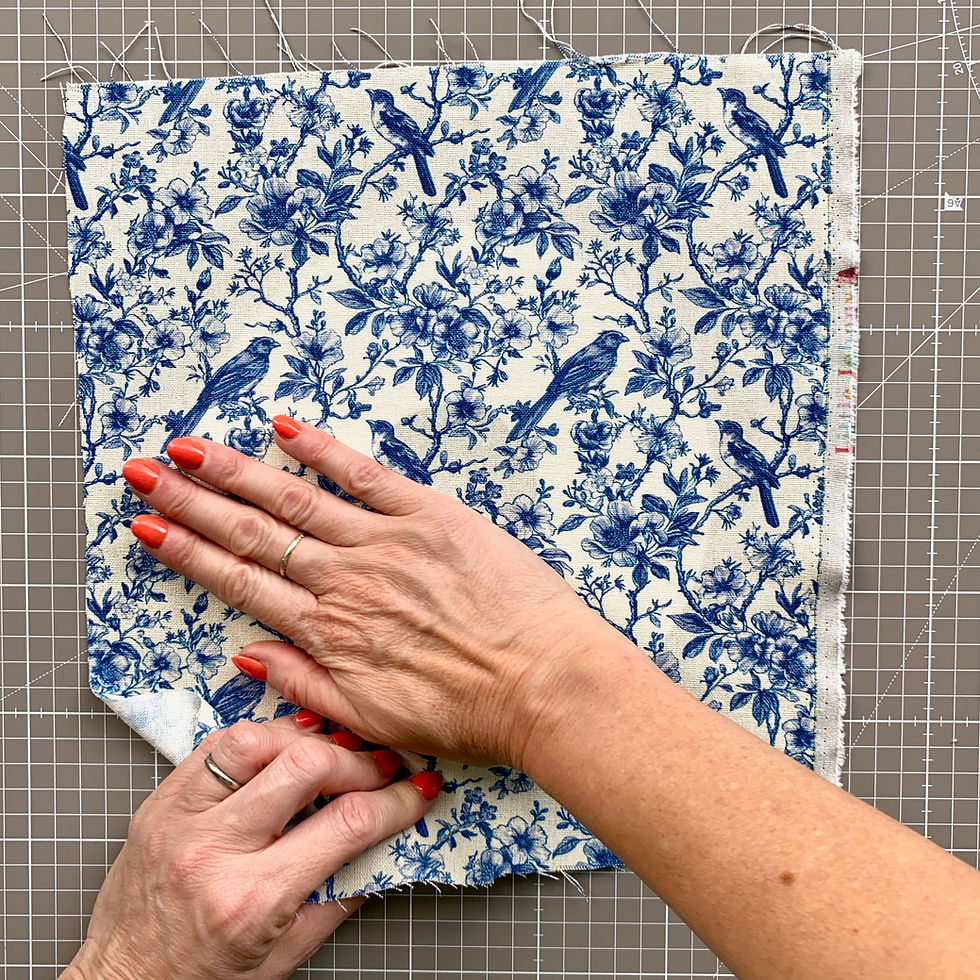
3. Place the diffuser carefully onto the Textile Self Adhesive Film and firmly press down a little at a time.

4. Turn over and smooth down.
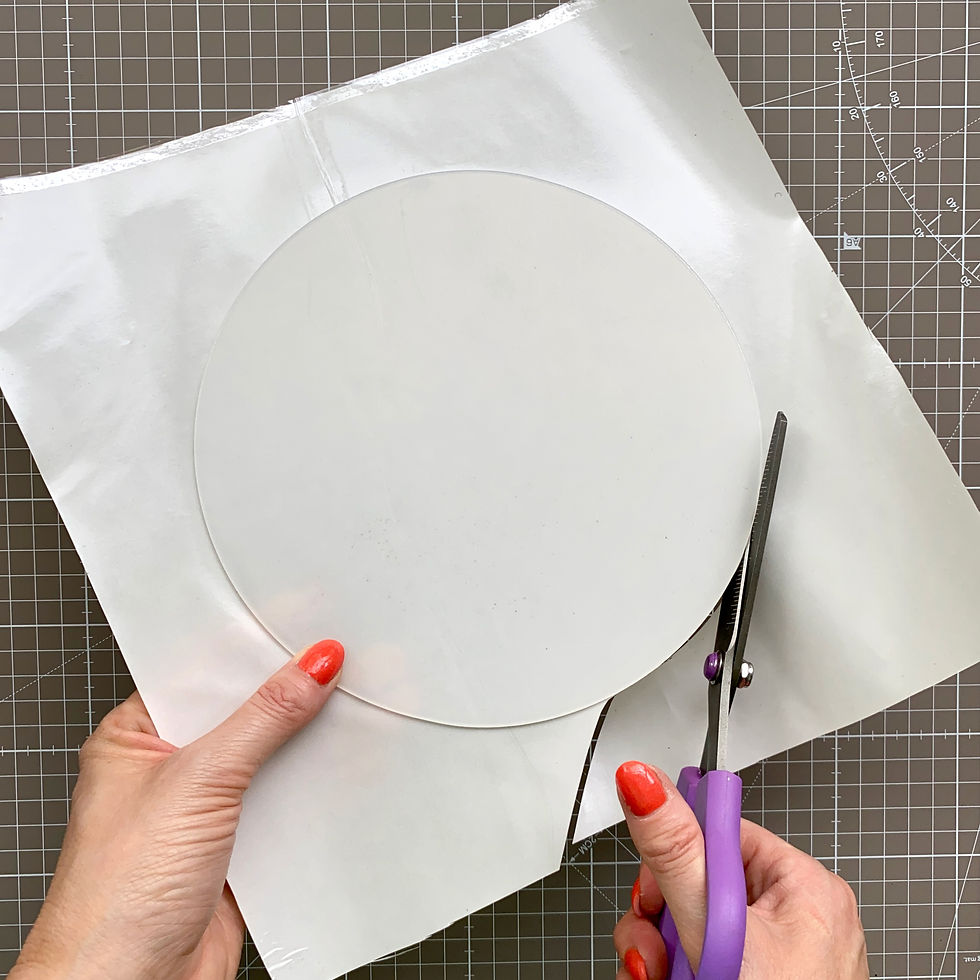
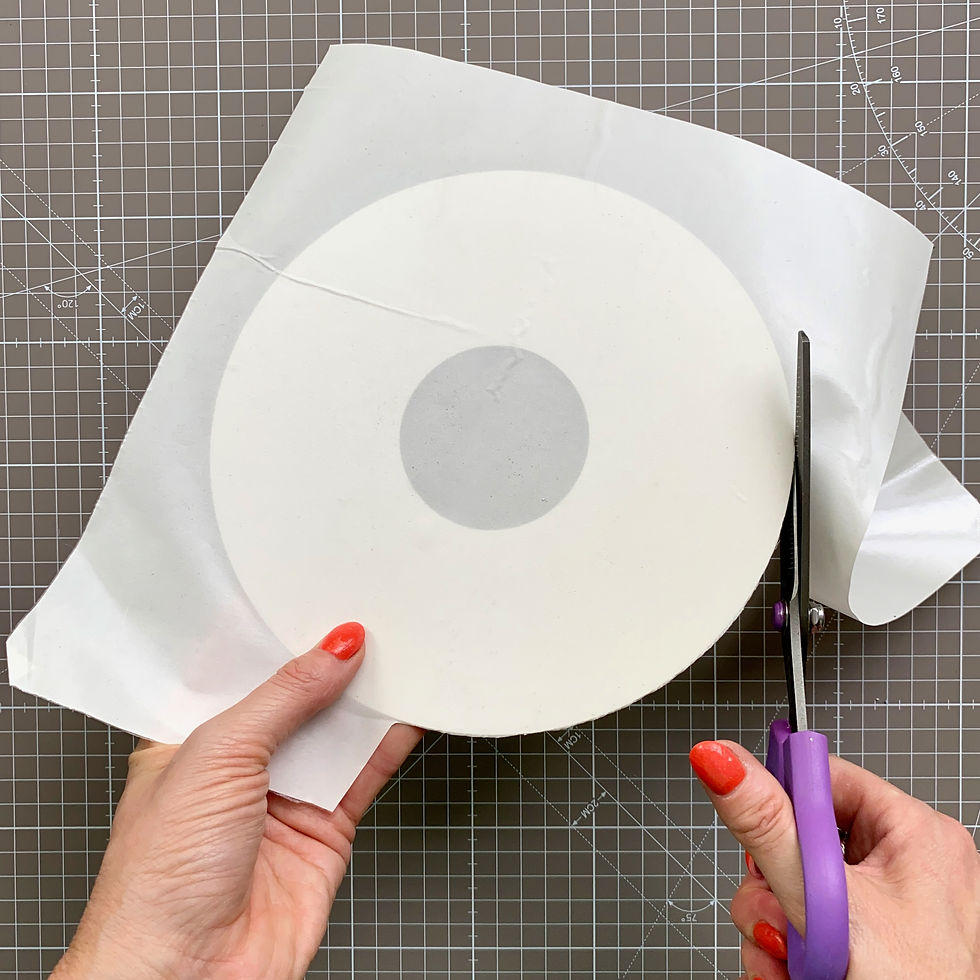
5. Cut around the edge using either scissors or a cutting knife and cutting mat.
6. Remove the backing paper to reveal around 5cm of the diffuser.
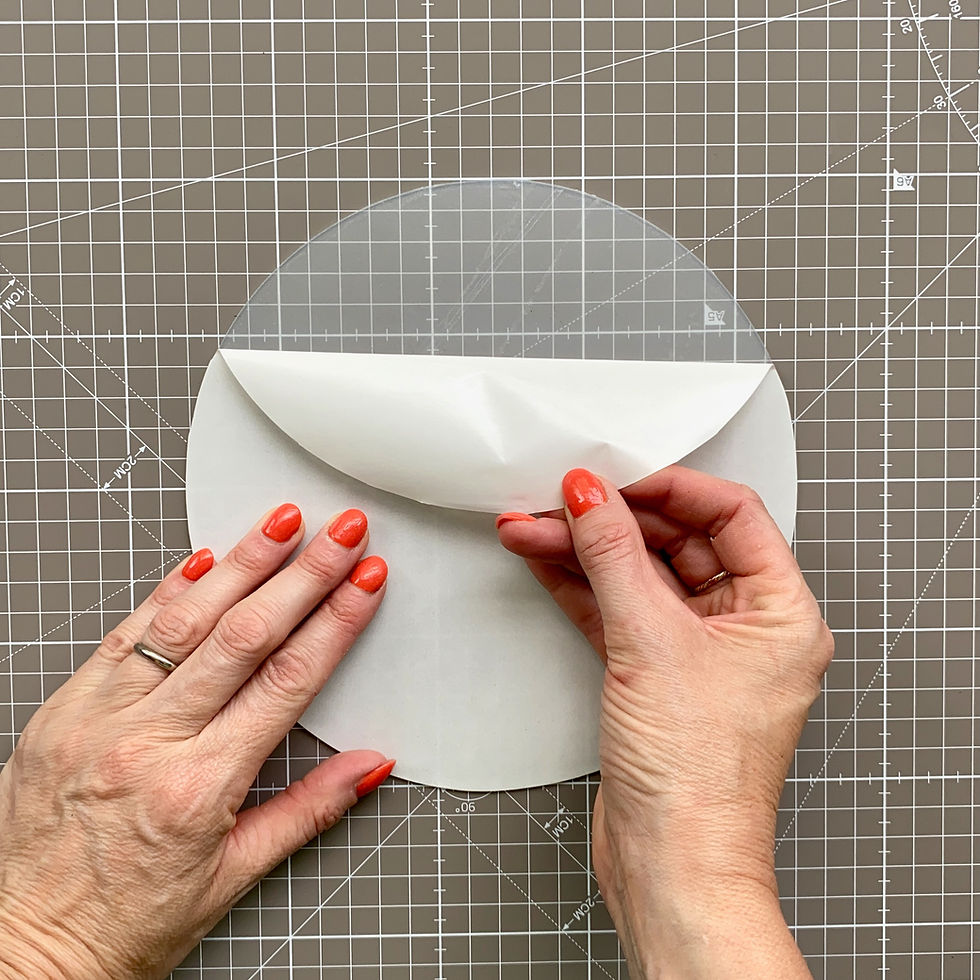
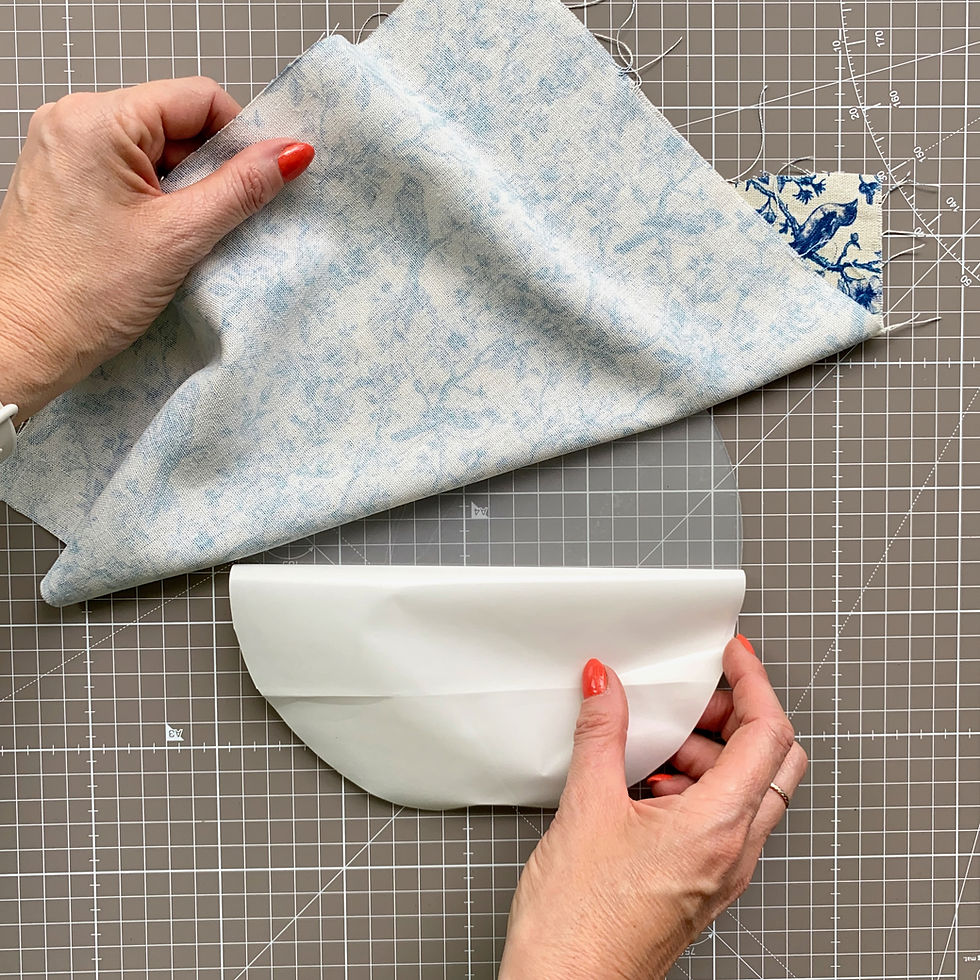
7. Place the pre-ironed fabric onto the Textile Self Adhesive Film sheet, over the revealed tacky section and smooth into place.
8. Repeat pulling away the backing paper in small sections, smoothing the fabric down at each stage.

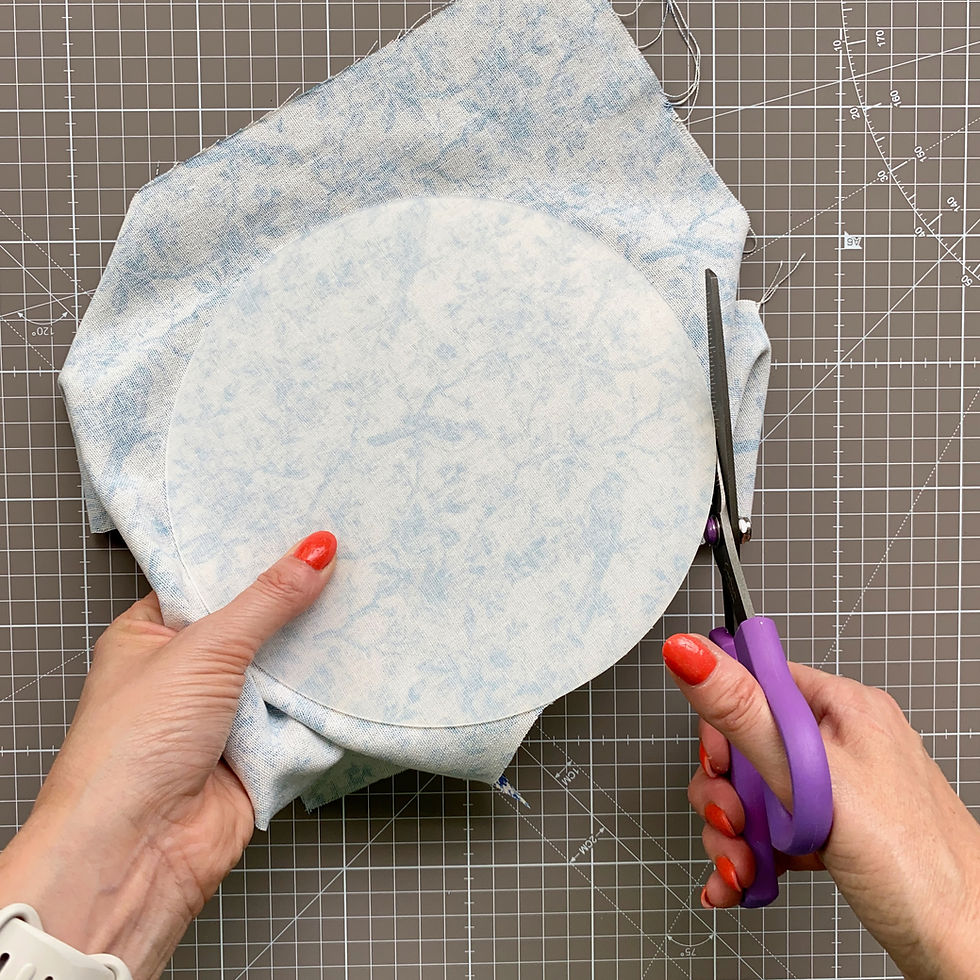
9. Carefully cut around the edges of the fabric.
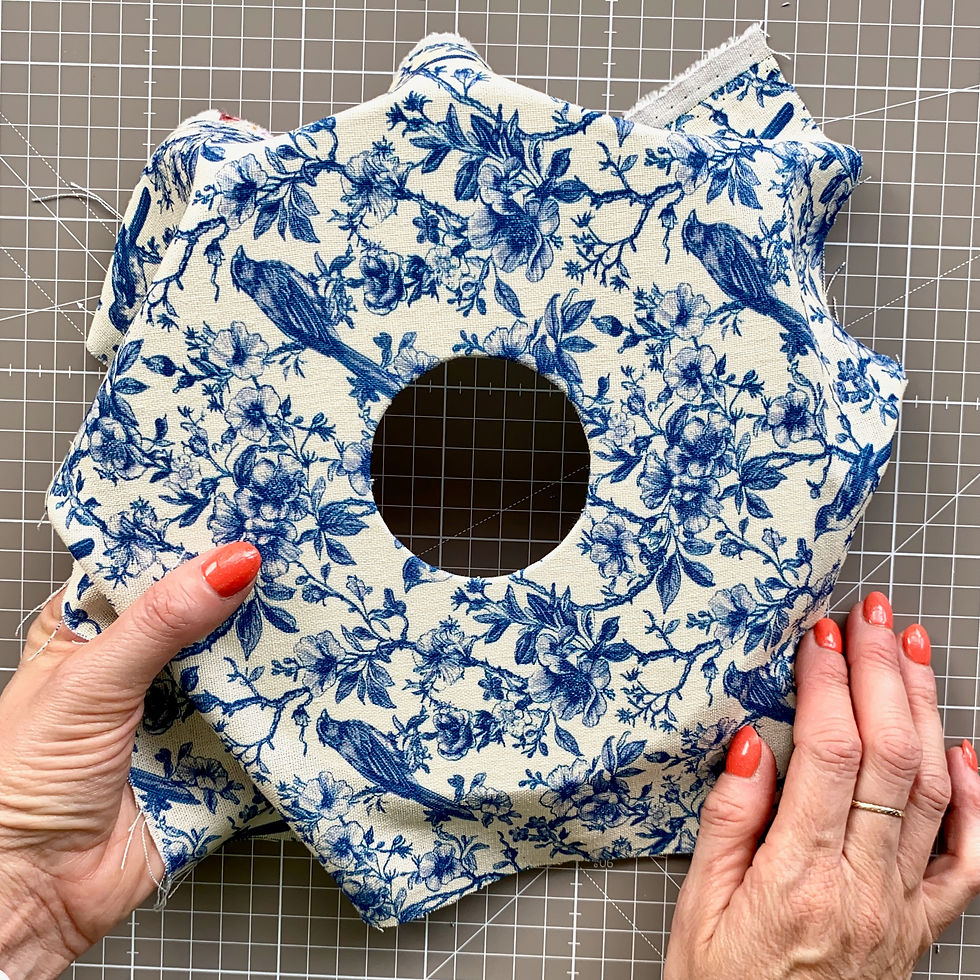
Making a Fabric Covered Foamex Lampshade Diffuser (with central die cut hole)
1. Iron your fabric removing any creases and place face down on a clean, flat surface.
2. Unroll the Textile Self Adhesive Film and cut to roughly 2cm wider than your diffuser. The film is extremely high tack, so we found it easier to secure this to our surface using pieces of masking tape in each corner, with the tacky side of the film facing up.

3. Place the diffuser carefully onto the Textile Self Adhesive Film and firmly press down a little at a time. Turn over and smooth down.
4. Cut around the edge using either scissors or a cutting knife and cutting mat.
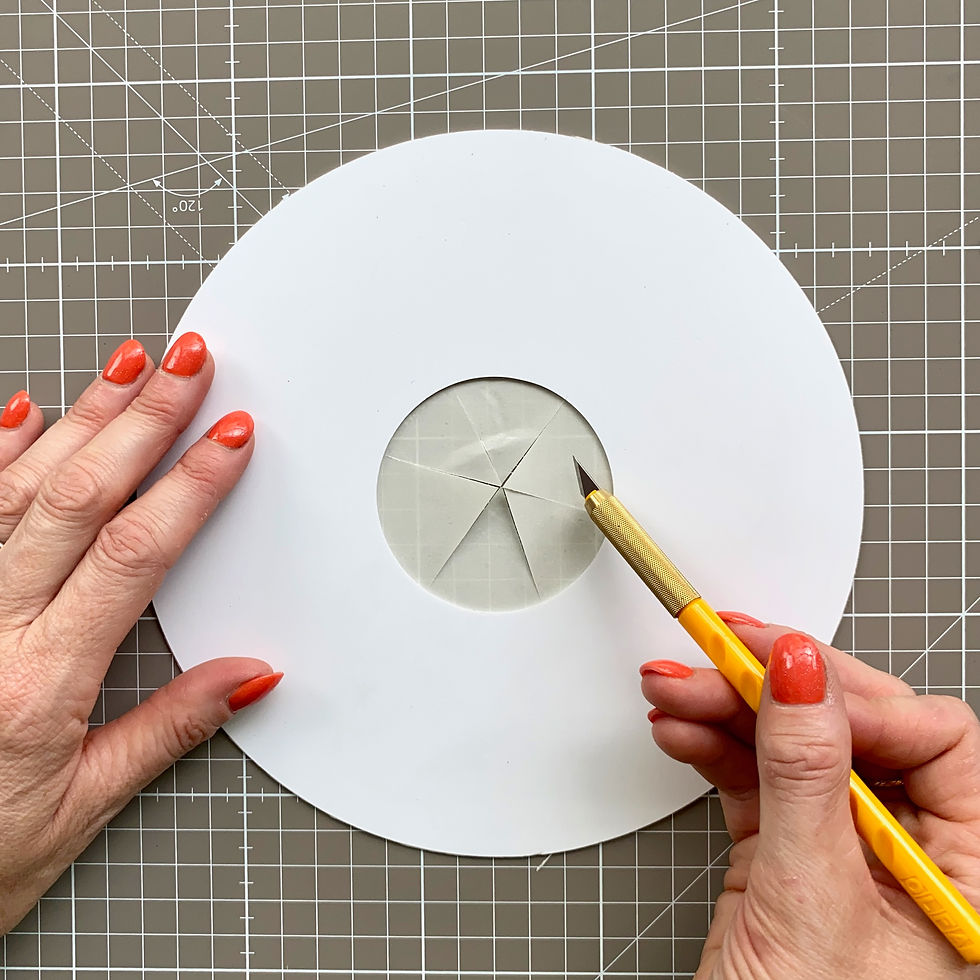
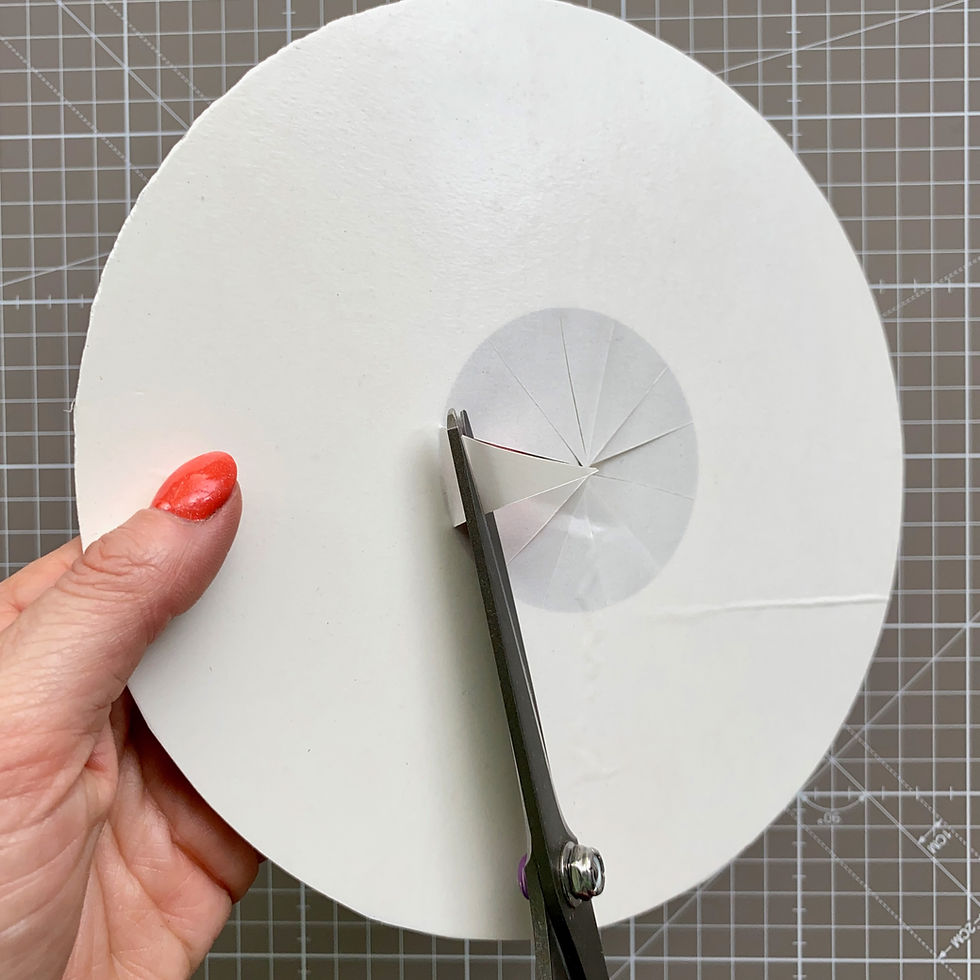
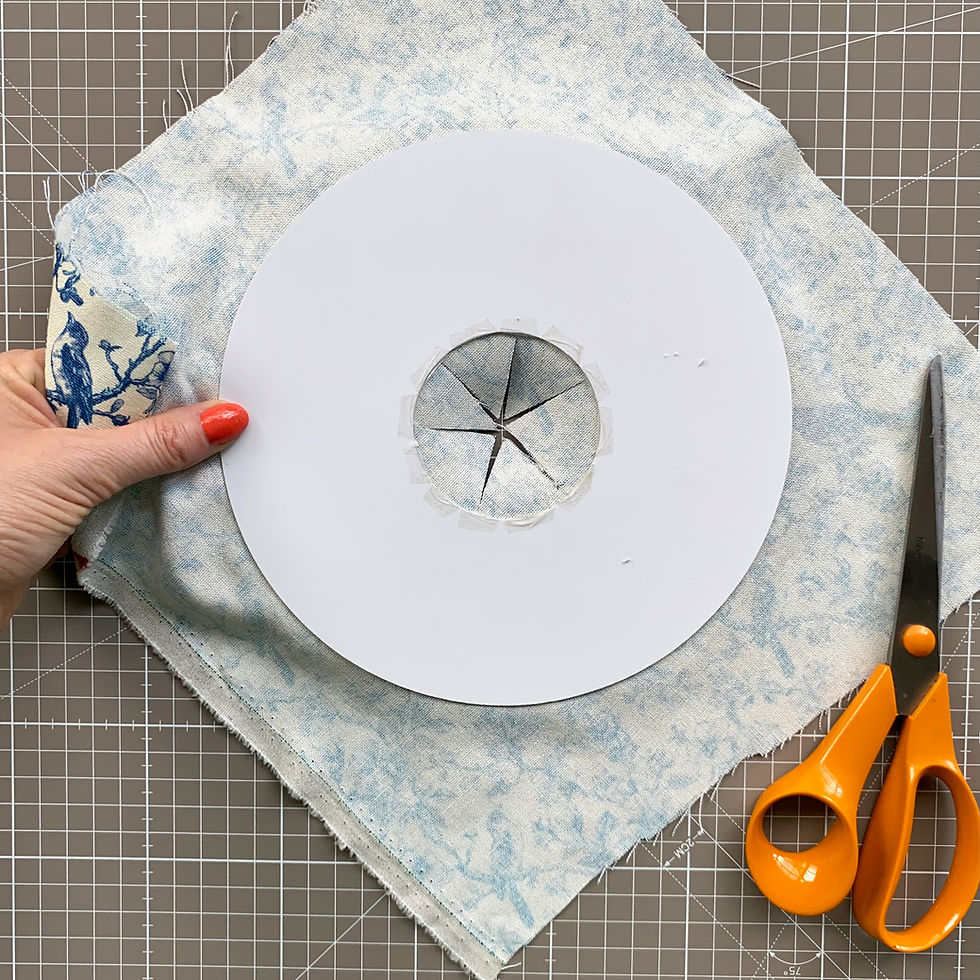
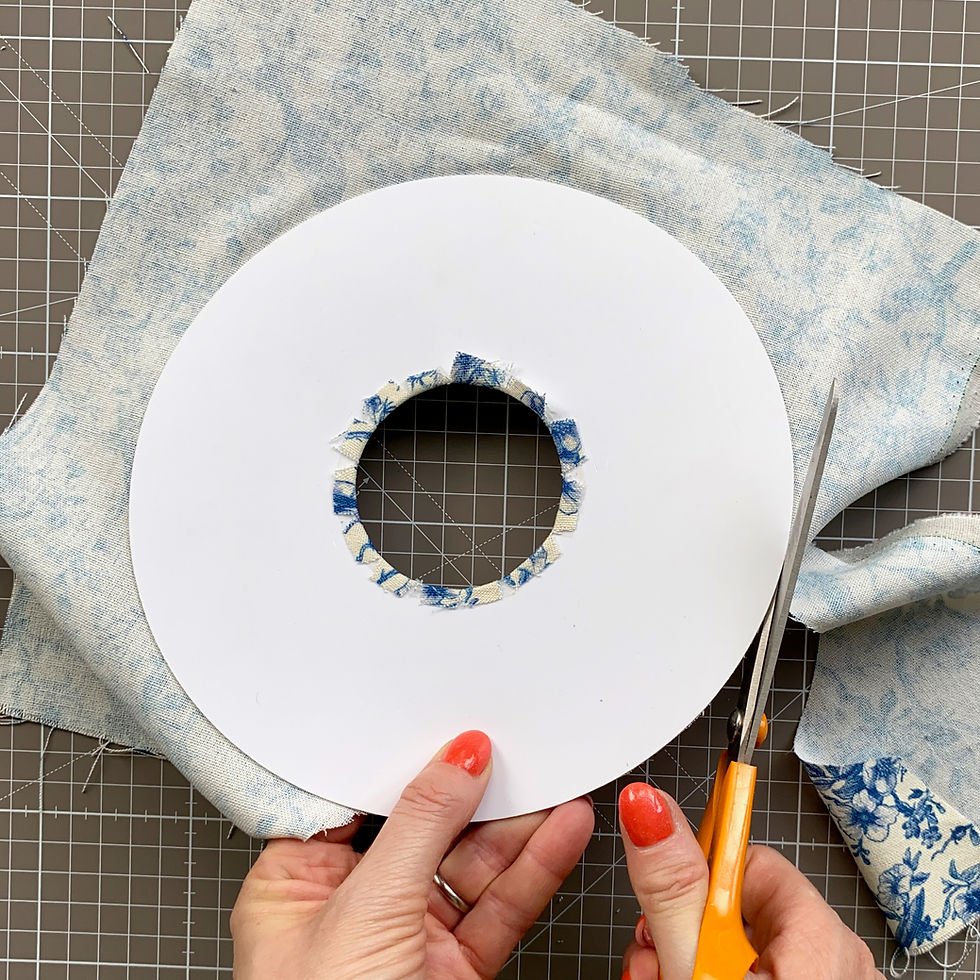
5. With a craft knife cut across the centre of the circle. Repeat twice more so you have six segments. Cut each segment in half again so you have 12 segments.
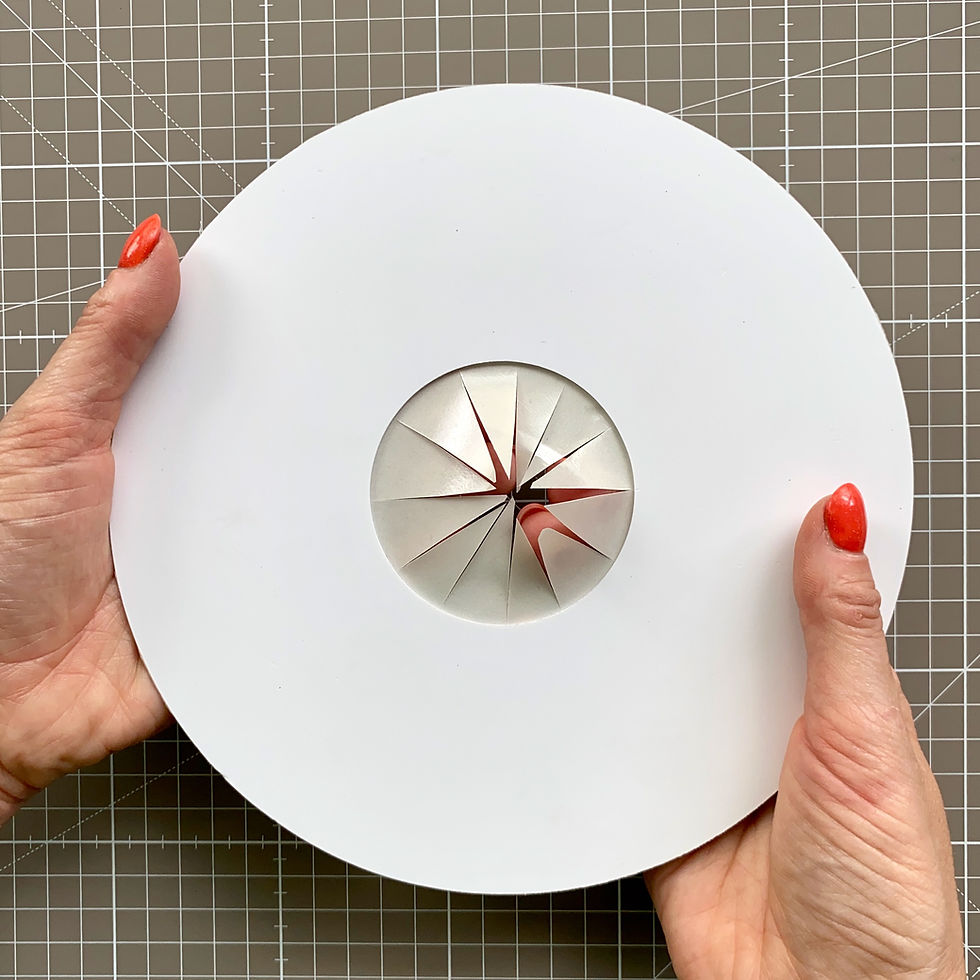
6. Pull each segment away from the centre hole and trim to 0.5cm high.
7. Gently trim away the backing paper in line with the edge of the centre circle, using a craft knife, then lift off the backing paper and discard.
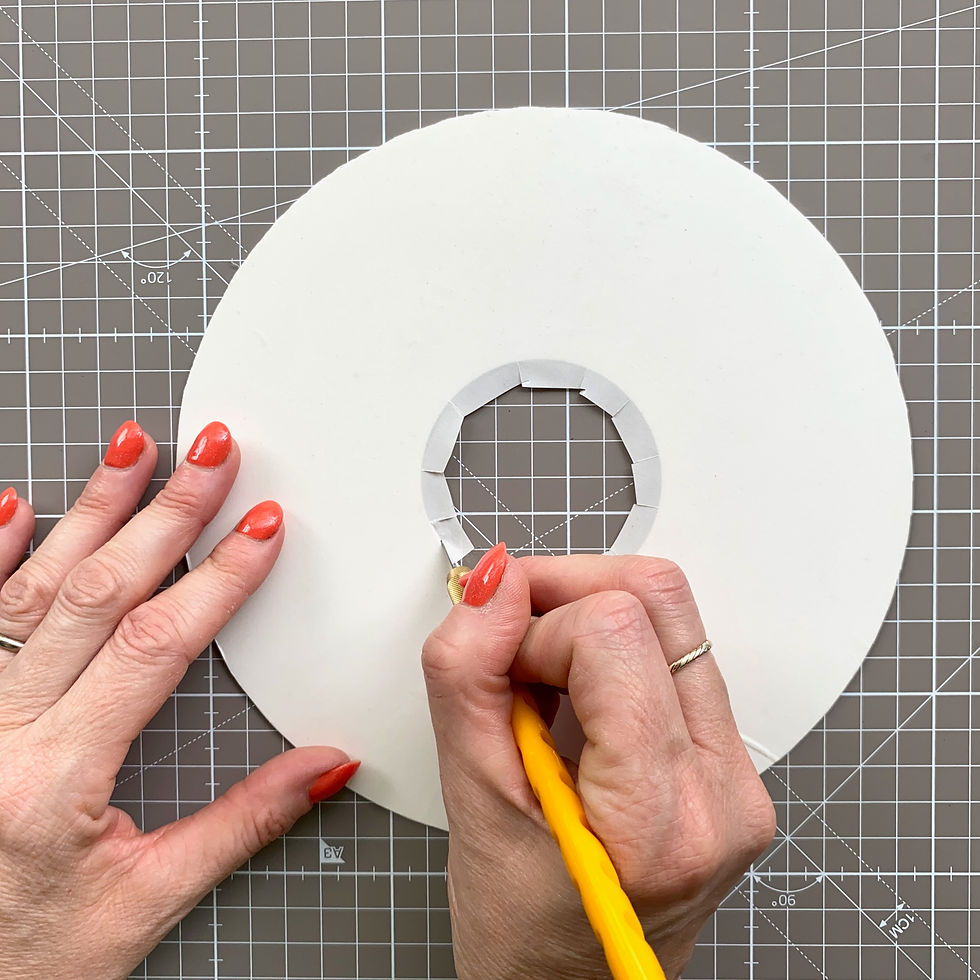
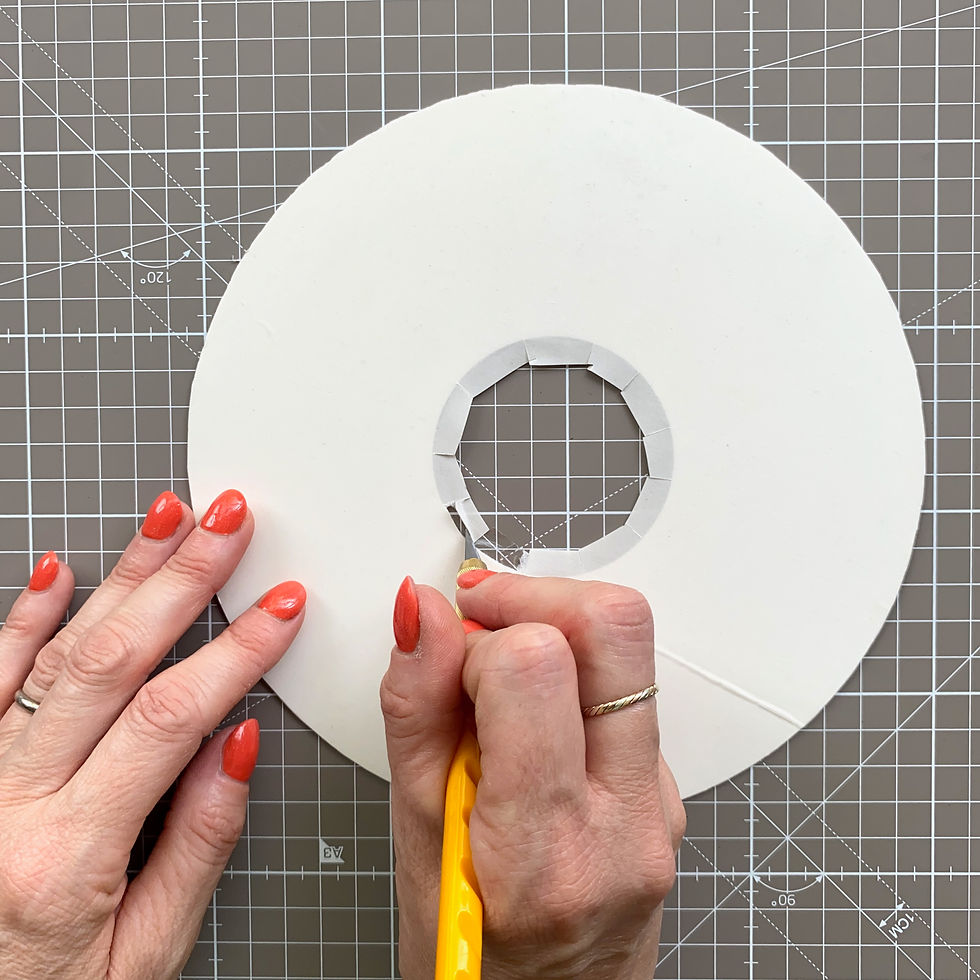
8. Fold the remaining sticky Textile Self Adhesive Film over, to adhere to the other side of the diffuser.
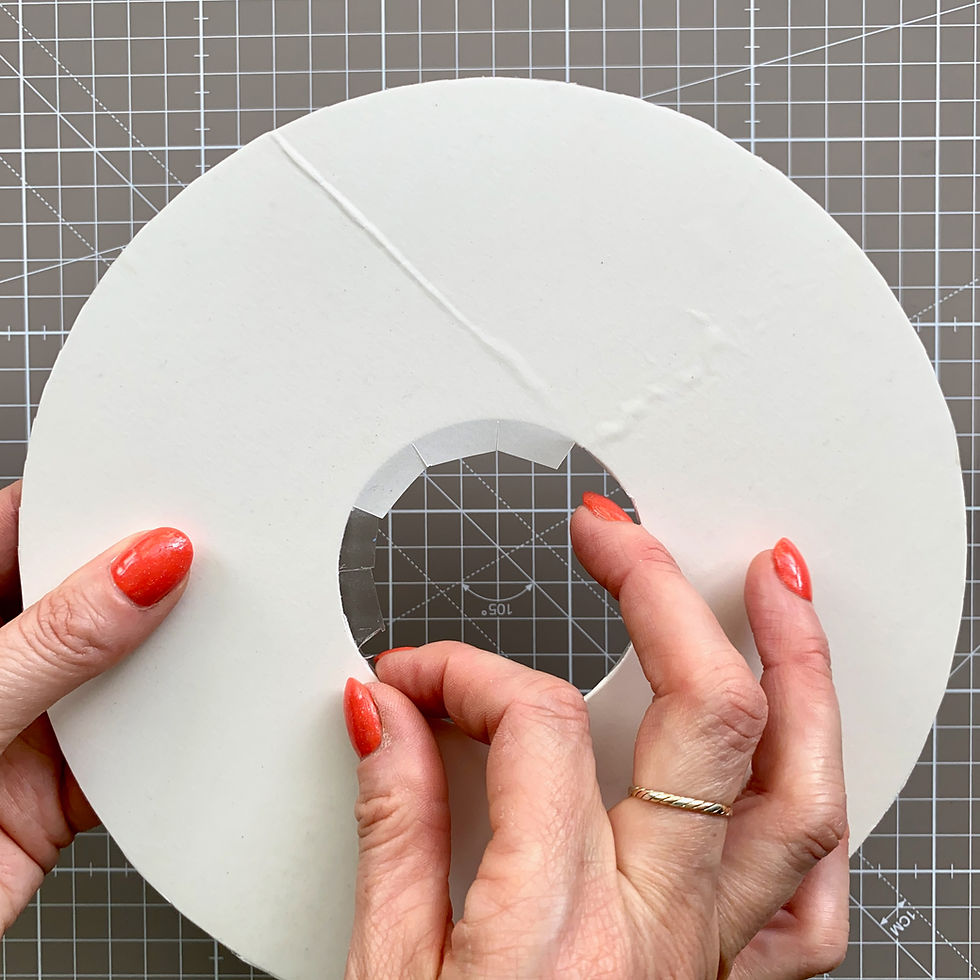
9. Remove the circle of backing paper to reveal around 5cm of the diffuser.

10. Place the pre-ironed fabric onto the Textile Self Adhesive Film sheet, over the revealed tacky section and smooth into place.
11. Repeat pulling away the backing paper in small sections and smoothing the fabric down at each stage.

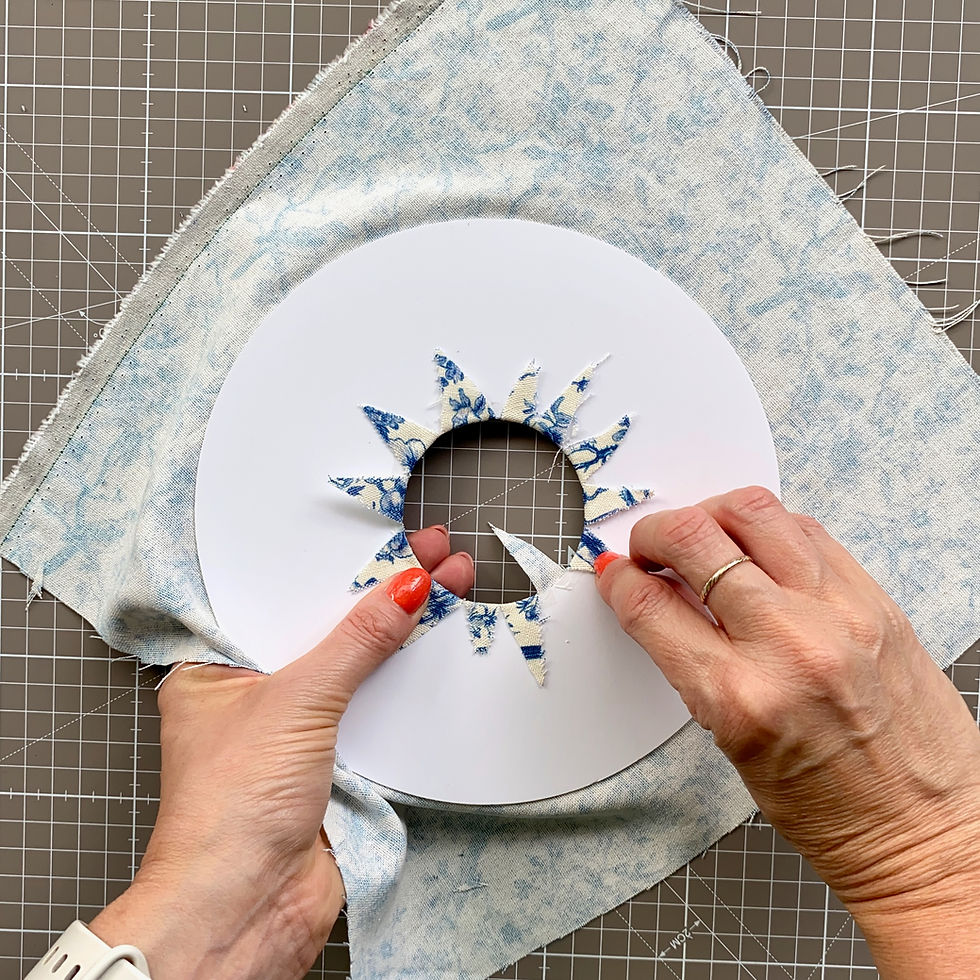
12. Repeat step 5, by cutting across the circle of fabric with a craft knife to create 12 segments. An alternative is to create a cut with the craft knife that allows you to insert a small pair of scissors to cut the segments.

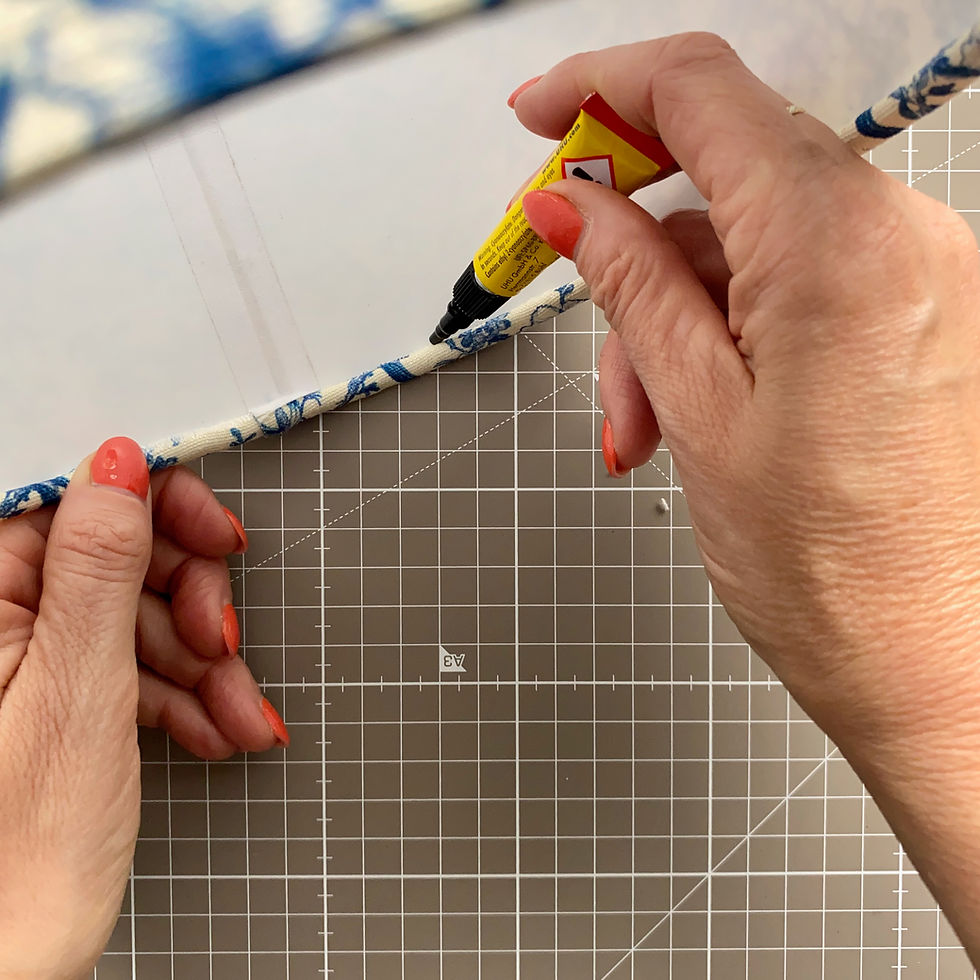
13. Carefully fold the fabric to the back of the diffuser, using the Textile Self Adhesive Film to hold the fabric segments in place.
Shorten each segment by trimming down with scissors.
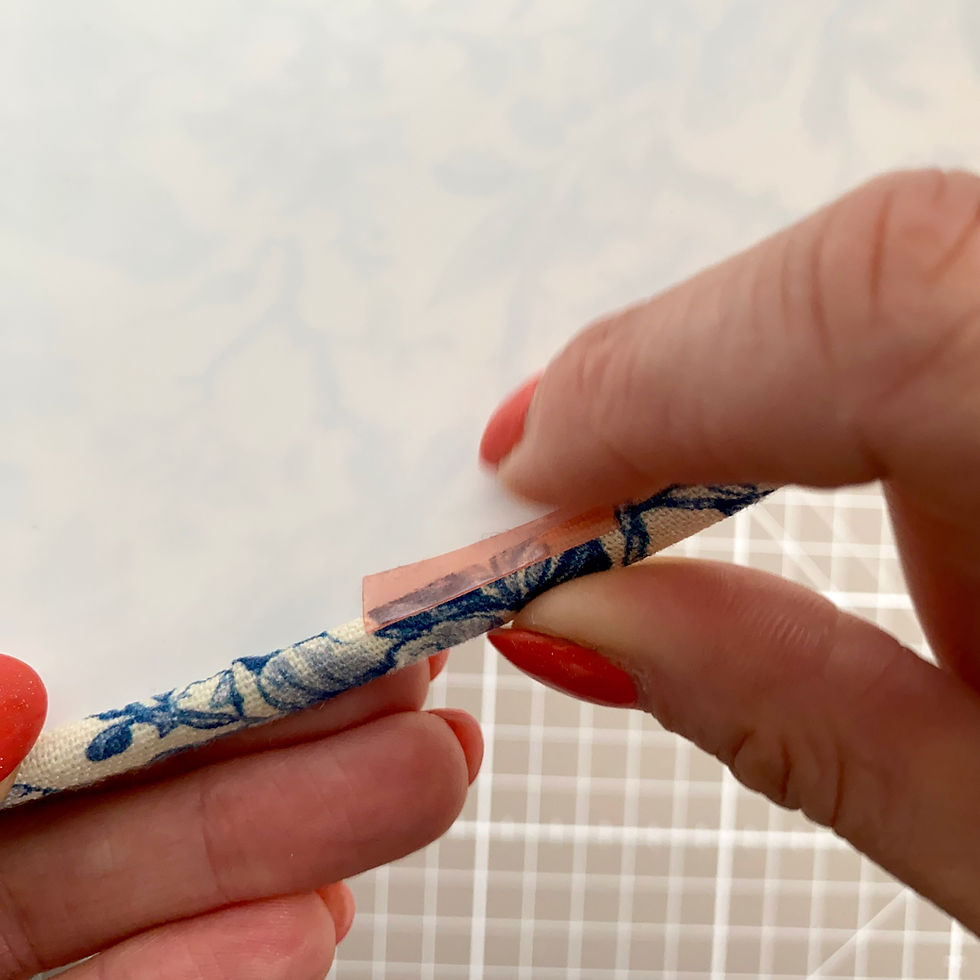
Professional Tip: If any of the fabric seems loose, secure in place with small pieces of 9mm double-sided tape.

Carefully cut around the fabric at on the outer circle.
How to Instal your Fabric Covered Lampshade Diffuser
1. Turn your table lamp upside down and add a thin layer of superglue or four small equally spaced sections of Tesa double sided tape to the inside of the top ring. Remove the backing from the tape.
2. Gently bend the diffuser and insert into the of your lampshade, with the fabric facing up.

3. Push down so this comes in to contact with the glued or taped edge.
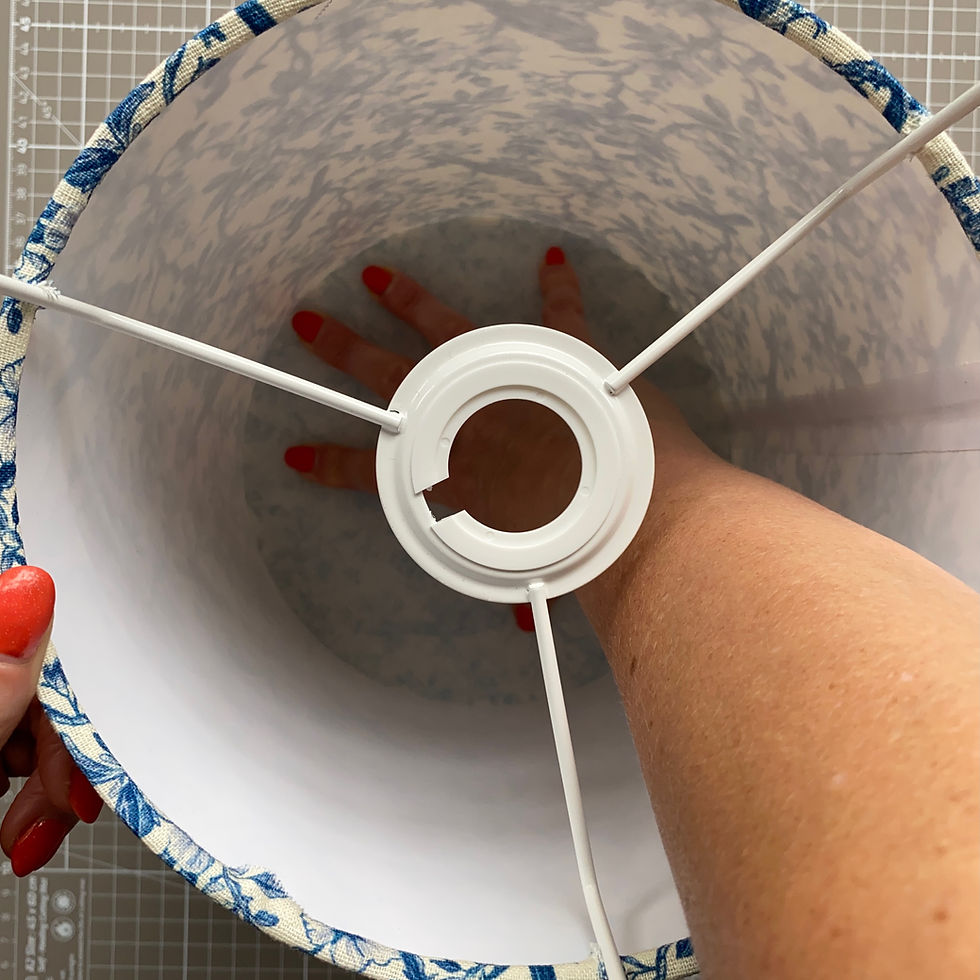
4. If using glue, leave to dry.

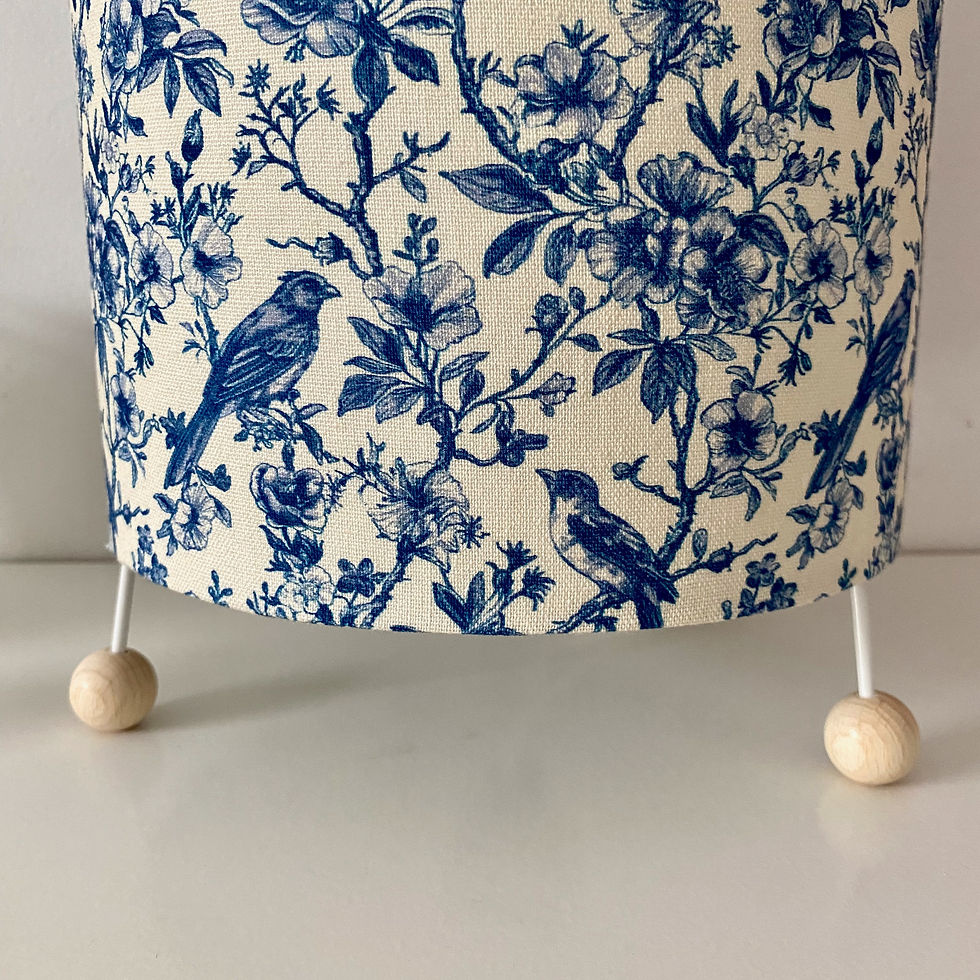
Add a Natural Touch to Your DIY Table Lamp
While the feet on the utility ring match the base perfectly, many of our creative makers prefer a more organic finish. A popular choice? Swapping them out for our beautiful Half Drilled 20mm Wooden Balls, crafted from smooth, high-quality beechwood.
These wooden balls can be left natural for a minimalist look, or you can personalise them with a splash of colour. For a more eye-catching finish, try painting or staining them to match your lamp's style. We love using Ronseal Chalky Furniture Paint, available in a gorgeous range of eight soft pastel and neutral shades.
Whether you're going for rustic charm or a modern twist, this simple change adds character and a handcrafted feel to your lamp project.

#DIYTableLamp #bespoketablelamp #lampshadediffuser #interiortrend #freestandingtablelamp #DIYlamptutorial #DIYtablelamp #tablelamptutorial #modernlampshade #lampshademaking #uniquelampshade #handmadelampshades #lampshadeinspiration


Comments