5 Secrets to Making DIY Lampshades with Thick Fabric
- Oct 18, 2023
- 4 min read
Updated: Jun 11, 2025
Needcraft Lampshade Making Kits work with many fabrics, but making a DIY Lampshade with thicker fabrics needs a little more consideration. Velvet, upholstery weight cottons, brocade, jacquards, tweeds, and wools all fit into the thicker fabrics category and today we’ll be sharing our expert advice on how to tackle every stage of your handmade lampshade, to ensure your lampshade is both perfect and professional.

#Tip 1 - Cutting out your lampshade fabric
All of our Lampshade Making Kits include a handy built-in seam allowance in the form of a kisscut, which is a scored line at the top and bottom of the Stick It PVC panel. Whilst this is perfect for many light and medium-weight fabrics, for lampshade making with thicker fabrics the kisscut needs to be widened, to create enough fabric to tuck under the rings in the final lamphade making stages. This is due to the thickness of the fabric taking up more space as it rolls around the ring.
Solution:
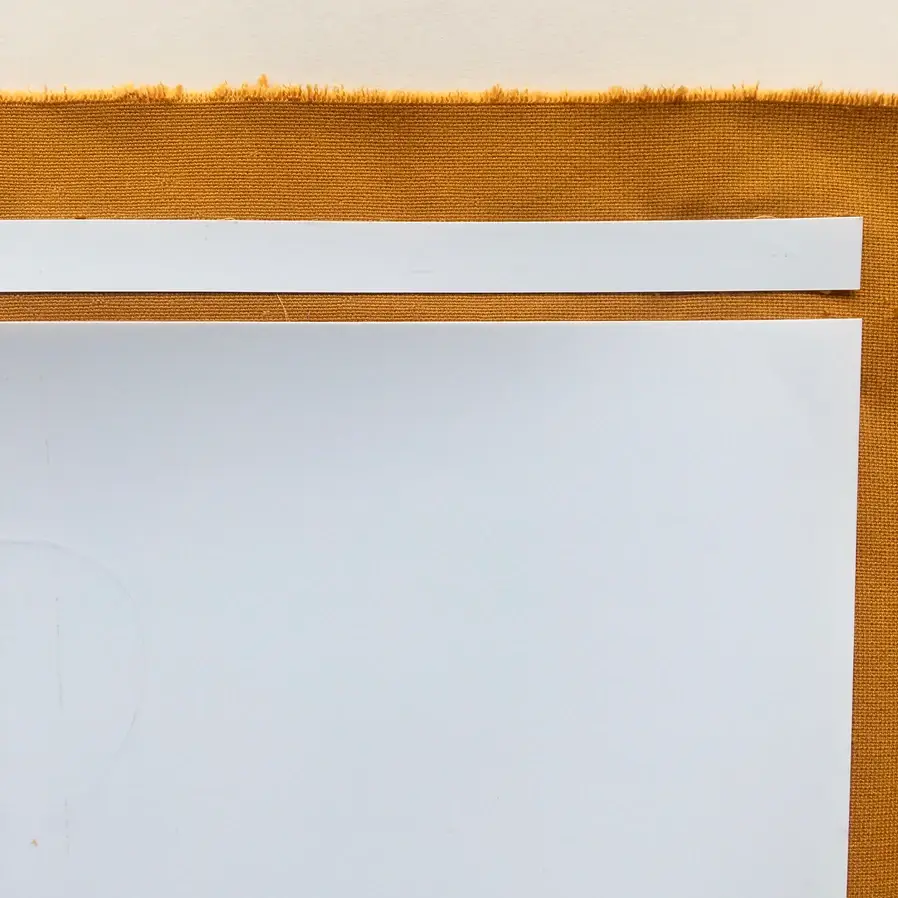
There are two different methods for widening the kisscut allowance. The first method is to remove your kisscuts from the panel before you lay this on your fabric. Once in position adhere the kisscut strips to the fabric, leaving a 5 -10mm gap between the panel and the kisscut, as pictured below, then cut out as normal.
The second method is to lay your panel including the kisscuts on the fabric and then mark an extra 5-10mm using tailor chalk or a fabric pen along the length, join the mark and use this as a cutting line.

#Tip 2 – Prevent fabric fraying
Fraying can be a problem with thicker fabrics, particularly those with an open weave such as courser upholstery fabrics and velvets, that although tightly woven tend to shed as soon as they are cut. The importance of managing fraying when making a DIY lampshade is that this can reduce the amount of fabric you have to tuck under the frame and at the seam, leaving you with a less-than-professional handmade lampshade.
Solution:
Preparing your seams in advance with Fray Stop ensures that you won’t experience fraying. A thin liquid adhesive, Fray Stop bonds the fabric fibres together invisibly, making it safe to cut through your fabric without it fraying. After following the steps above, to prepare your kisscut, simply brush the Fray Stop underneath the edge of the kisscut cutting line or the line you have marked in be measuring. Once dry, cut as usual.


#Tip 3 - Handling the seam
Again, due to the pile or depth of thicker fabrics, the seam needs to be handled differently to the straight-cut seam we describe in our Lampshade Making Kit instructions, included in the kit.
Solution:
We recommend creating a Folded Fabric Edge Seam, when using a thicker fabric due to fraying and the visible fabric edge that will be seen if you follow or kit instructions straight cut seam. Follow our Blog Tutorial - Folded Fabric Seam Edge to achieve this professional seam finish, but in place of using just one single line of double-sided tape, we recommend our alternative tapes such as Seamstick or Soft Furnishing Tape, to ensure a strong bond at the seam where the fabrics meet.
Many of our professional lampshade makers also a minimal amount of glue when closing their seam, for extra bonding:
Lucy Lo-Vel of The Light Punk:
I’ll often use two lines of my chosen tape (Seamstick in my world) with a line of gel superglue down the middle of them. Trial and error have made this my chosen method!


#Tip 4 – Rolling the rings
Although rolling your lampshade rings may seem straightforward – keeping the taped lampshade ring on the PVC, ensuring the rings stay in a straight line - there is a trick that will help you with whatever fabric you’re using to make life easier at the final stage
Solution:
When rolling the rings and trying to keep the rings in a precise line, it’s easy to put pressure onto the rings from above. Lightly pressing on the rings achieves two things when working with thicker fabrics; the first is that the lighter the pressure means it’s easier to tuck your fabric underneath the ring, in the final stage; the second is that some thicker fabrics have a pile, particularly velvet which is easily crushed by pressure.
Our tip is to start off rolling with your hands at the top of the rings and once secured to the PVC, turn and roll the ring towards you, which is the featured technique in our “how to make a lampshade’ YouTube Video with our expert demonstrator, Sam, below.
#Tip 5 – Tucking in the fabric edge
Tucking in the fabric margin is what seals the deal when making a professional handmade lampshade, which with a thinner fabric gives a crisp edge along the top and bottom of your DIY lampshade. As thicker fabric tend to be either bouncier or rigid, dependant on what the fibres it’s made from, more consideration needs to be given to tucking in form the tools you use to different techniques that help you achieve that professional edge.
Solutions:
Tools – Although we provide a Rolled Edge Tool in every kit we sell, thicker fabrics may respond better to a firmer push, which is easier with a butter knife or an old credit card! Whilst some fibres, such as wool and tweed can be slippery against the surface of the PVC and, therefore easy to tuck in, others may not behave so well and be harder to secure under the rings so having a range of tools available to try is helpful.
Our NEW Rolled Edge Tool id ideal for working with thicker fabrics, with it's robust design and smooth edges.

Techniques – Always remember to cut away a 1cm x 1 cm square from the inside seam, allowing the outer seam fabric to lay over the ring and tuck in. This is especially important for thicker fabrics to avoid a double layer of fabric, that creates unsightly bulk at the seam.
Tricks – When tucking in a thicker fabric, use your thumb to hold the fabric in place, as you move around the ring. This stops the fabric from bouncing away from the ring, to create a neat, professional edge.


#velvetlampshades #tuckingin #tipsandtricks #professionaledge #finishingalampshade #lampshadeedge #rollededgetool #tuckingtools #foldededgeseam #seamallowance #kisscuts #troubleshoting #fraying #tips #techniques #professionallampshademakers #lampshademakingkits #DIYlampshade #dannells #needcraft_ #lampshades #lampshademakers #makersgonnamake #lookwhatimade #lampshade #lampshadedesign #lampshadedesigner #lampshademaking #handmadeshade #bespokeshade #budgetinteriors #interiordesigntrends


Comments