Lampshade Kit Hack #5 - Happy Holidays Map
- Jan 29, 2021
- 4 min read
Updated: Nov 23, 2023
Hands up who’s dreaming of a holiday escape? 🙌🏻
We Britons love our holidays - a day by on the beach, playing in the sand and sea rounded off with a fish and chip supper. We thought we’d capture those happy holidays with one of our Rectangle Rounded Lampshade Making Kits and in this DIY tutorial we’re going to show you how to make a lampshade using a paper map.
Whilst this project uses regular lampshade making skills, there are a few differences when working with paper, but simply follow our step by steps and you’ll be able to create a little piece of holiday sunshine of your own!
What you'll need
Masking tape
Paper scissors
Ordinance Survey Map or similar
Ruler or tape measure
Pencil
Old loyalty card / butter knife
Notes:
We discovered when picking a map for this project that Ordinance survey maps differing in width. You could of could buy an off the shelf map to suit the size of the shade you’d like to use.
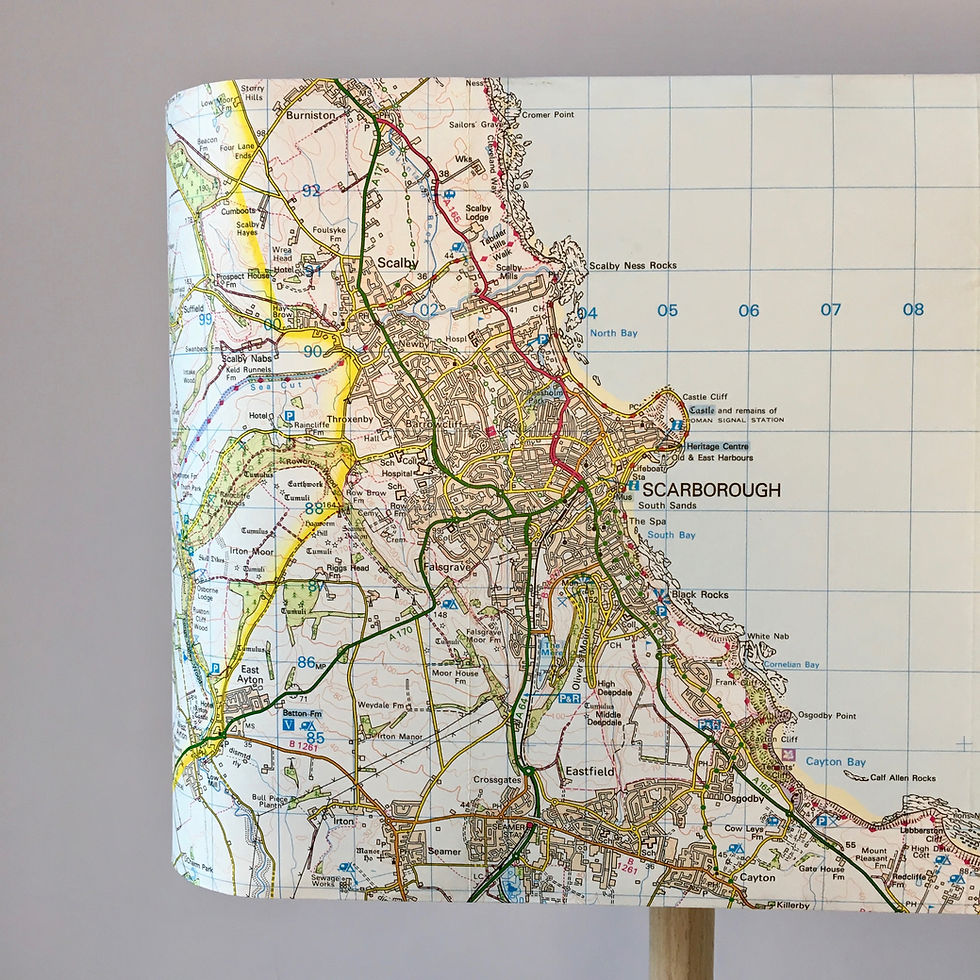
Our map measured 94 cm long so we had a choice of using the 25cm Drum Lampshade and the 30cm Rectangle (rounded) Lampshade. We wanted to frame the town of Scarborough at the front of the map and we really liked the contrast between the land and the sea in terms of colours, therefore picked the Rectangle Lampshade to showcase an elongated version of the town.
How to make your Happy Holidays Map Lampshade
1. Look at the width of your map and choose a corresponding shade. All of the lengths of the PVC are included in the kits are listed on the website.

2. Think about how you will position the key part of your map best, by laying the PVC from your kit over the area.

3. Iron your map, on a low heat. Be patient and carefully remove as many of the creases as you can – ideally the map will be as flat as possible. We had a few creases left in our map, which initially we though would be seen on the final lampshade, but these came out once the PVC was adhered.

4. If using a large map cut away the excess map at the top and bottom leaving at least 5-10 cm for positioning your PVC. Flip the map over and position the PVC to capture your town or landmark and mark the position of the top and bottom of the PVC with a pencil along all sides to create a guide.

5. If you want to check you position gently fold over the top and bottom of the map and flip over to have a look. You can also cut away more of the excess above and below to make the next stage easier.
6. Fold back and remove the kiss cuts from the PVC.

7. Measure the depth of the kiss cut – ours was 1.5cm.

8. Below your top pencil line, measure down the depth of the kiss cut and draw in a new line marked in red. This will be your new guideline for positioning your PVC and create a margin of paper at the top and bottom of the shade for tucking under later.

9. If you would like to create a folded seam edge, before cutting out on the left hand short edge measure 1 cm away from the left hand short edge and draw in a line, then follow the instructions in our blog post.
10. Cut away the overlapping edge of backing paper from the kiss cut. Using 5 cm lengths of masking tape, line up your PVC along the top guideline and position the tape along the top edge to create a hinge. 4-5 pieces of tape should be enough.

11. Peeling back the backing paper by around 5-10 cm, position the short side of the PVC on the short side line on the right hand side.

12. Continue to peel back the backing paper and adhere the PVC to the back of the map. Note that with paper it's better to pull away smaller amounts of the backing paper and smooth down in the direction of the backing paper.


13. Cut around the PVC along the guidelines and clean along the edge of the PVC at the short sides.

14. To centralise Scarborough in the middle of one of the long side of our rectangle lampshade frames we marked the centre of the long edges of the frames with a pencil. We started rolling the frames onto the PVC at this point.


15. Cut away a square from the top and bottom overlaps of the seam as shown. This prevents a double layer of paper needing to be tucked under the frames.

16. Gently fold down the paper over the taped rings but avoid pushing under the ring, as with a fabric shade. Using your thumbs, smooth the paper down in small sections, to get a professional edge.

Top tip: When tucking in we’ve found using an old loyalty card or butter knife, instead of the finishing tool avoid puncturing the paper. For other useful tools check out our post on Top 5 household tools for making lampshades blog post.
17. Starting at the inside seam, gently push the paper under the ring using the loyalty card. Use small strokes pushing along the length of the frame to avoid damaging the wallpaper.

18. When you reach the spokes, snip these with the scissors in line with the spokes, pushing the paper down each side of the spokes, for a clean finish.

20. Continue to tuck under your map under the frames and voila – you’re done!


#maplampshade #holidaylampshade #memorylampshade #lampshademaking #lampshademaker #paperlamphade #DIYtutorial #papercraft #stepbystep #lockdownproject #lampshademakingskills #DIYshadetutorial #lampshadehacks #creativeshades #hacks #tutorial #tipsandtricks #lampshademakingkits #handmadeshade #uniquelampshadedesign #DIYlampshade #lampshadeknowhow #professionalshades #shademaking #uniquelampshadedesign #makerscommunity #craftkits #lampshademaking #lampshademaker


Comments