Finishing touches for making the perfect handmade lampshade
- Nov 22, 2018
- 3 min read
You’ll wish you knew about these years ago!
Luckily for you, we have access to hundreds of lampshade makers (738 and counting!) as well as their expert tips (more about this later) . Over the coming months we will unpick some of the main lampshade making issues and give you top tips from expert lampshade makers so you can overcome messy finishes and produce truly professional handmade lampshades.
In this post we’re going to look at a very common lampshade making issue and give you some great advice on how to work around the problem. Imagine, you’ve mastered your lampshade project and made a beaut of a shade when you spot niggly little bits of fraying fabric that won’t disappear! We can’t be having that!
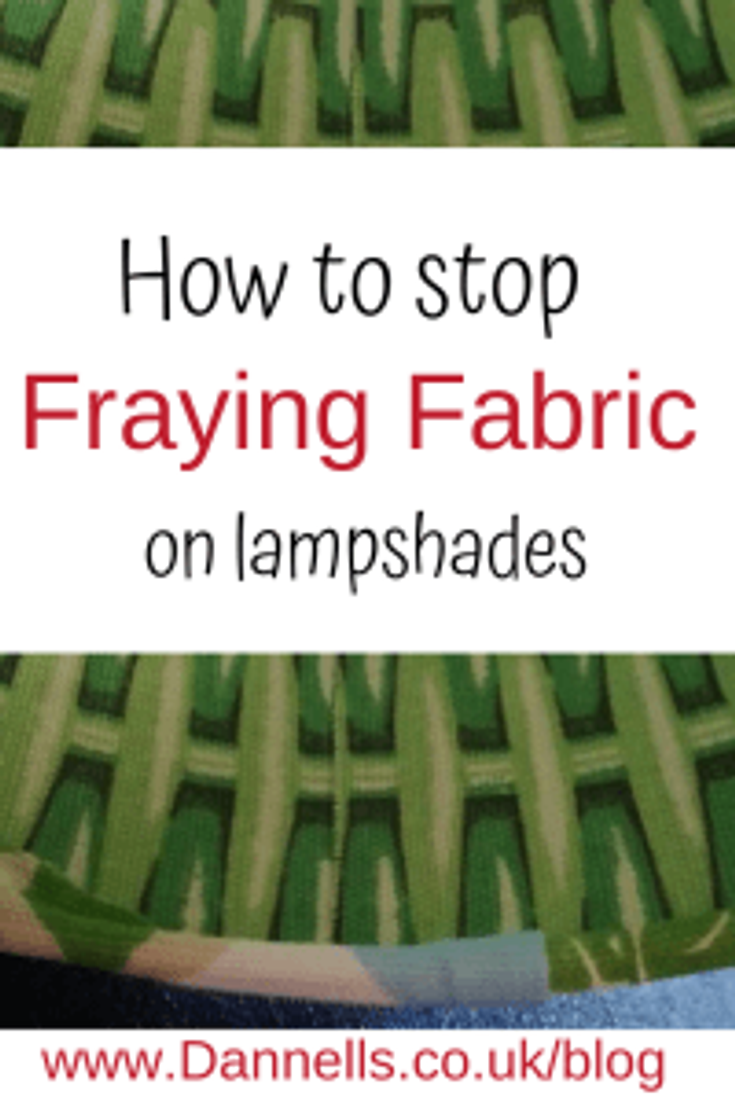
How to stop unsightly fraying fabric on your handmade lampshade
Fraying fabric on a drum or coolie lampshade, mostly happens on the inside edge of the shade.

Tips
We recommend experimenting with the following top tips from our lampshade makers group so you can find one that works for you and the fabric you’re using. Oh, and please do let us know how you get on in the comments below this post.
A strip of Self-Adhesive Binding Tape is something one of our expert lampshade makers often uses, when her lampshade lining is coloured white. This hides the seam completely.
Washi tape is a similar technique to above though not designed specifically for lampshade making. Many people in our group use it and it comes in several colours and patterns. It can tend to creasing at times.
A strip of pvc (you would need to cut this yourself) stuck over the join with ribbon stuck over it to cover up the cut edge (similar to the two above but handmade).
Once you feel confident enough you can cut the fabric a good couple of millimetres shy of the end to avoid frays. Remember, this is the end that stays hidden at the back.
One of our members suggests very carefully applying a tiny amount of clear nail varnish to stop any unruly bits of fabric from straying.
PVA on a skinny bristled artist’s brush and ‘sweep’ round the the frayed ends, applying pressure as you go, pushing gently into the edge. Wipe with a damp cloth when you’re done… and give it 5-10 minutes to dry and you’re done! Takes less than 5 minutes to do on a 40cm and it’s not going anywhere – solid and even water resistant! Lou Gardner-Thomas
Use a bit of glue, this is fiddly and time consuming but it works, just make sure you wipe the glue off the lining as you go. One lady in our group uses a wet wipe to clear the excess glue.
Fray stoppa is a useful product that has been mentioned several times on our group.
There is also a Fray Check though our group members seem to think Fray stoppa works best.
Paverpol fabric adhesive has been suggested and is apparently very strong.
A bias strip of fabric laid and glued flat over the seam before tucking the outer layer of fabric in.
I try not to take the fabric right to the edge especially if it is quite thick. By starting .5 cm in from the edge I avoid any fraying and it reduces the bulk on the join and tucks around the rings. I measure and mark the fabric before applying the pvc, then cut away. 5 cm on the edge which will be underneath. Then stick the fabric on. Carole Engalnd
How do you finish yours?
We’d love to hear other tips in the comments below!
These tips are from the lovely members of our lampshade makers group, would you like to join for support and inspiration with your DIY lampshades? Join HERE.
Look out for next topic, ‘how to neatly tuck your fabric into the top and base ring’.
You may also like this post on the 5 most popular tools for finishing off a handmade lampshade


Comments