DIY Tutorial - How to make a Double-Sided Lampshade
- Jun 2
- 4 min read
A double-sided lampshade brings twice the style and creativity to your space, giving you the chance to combine not one, but two beautiful fabrics or papers in a single lampshade. Even more exciting, you can create a striking ‘silhouette’ effect - a hidden design that magically reveals itself when the lamp is switched on.
In today’s blog post, we’ll guide you step by step through everything you need to know to achieve this eye-catching lampshade look, from choosing the perfect coverings to inspiration from expert makers, helping you bring your design ideas to life.

Dannells Materials you will need:
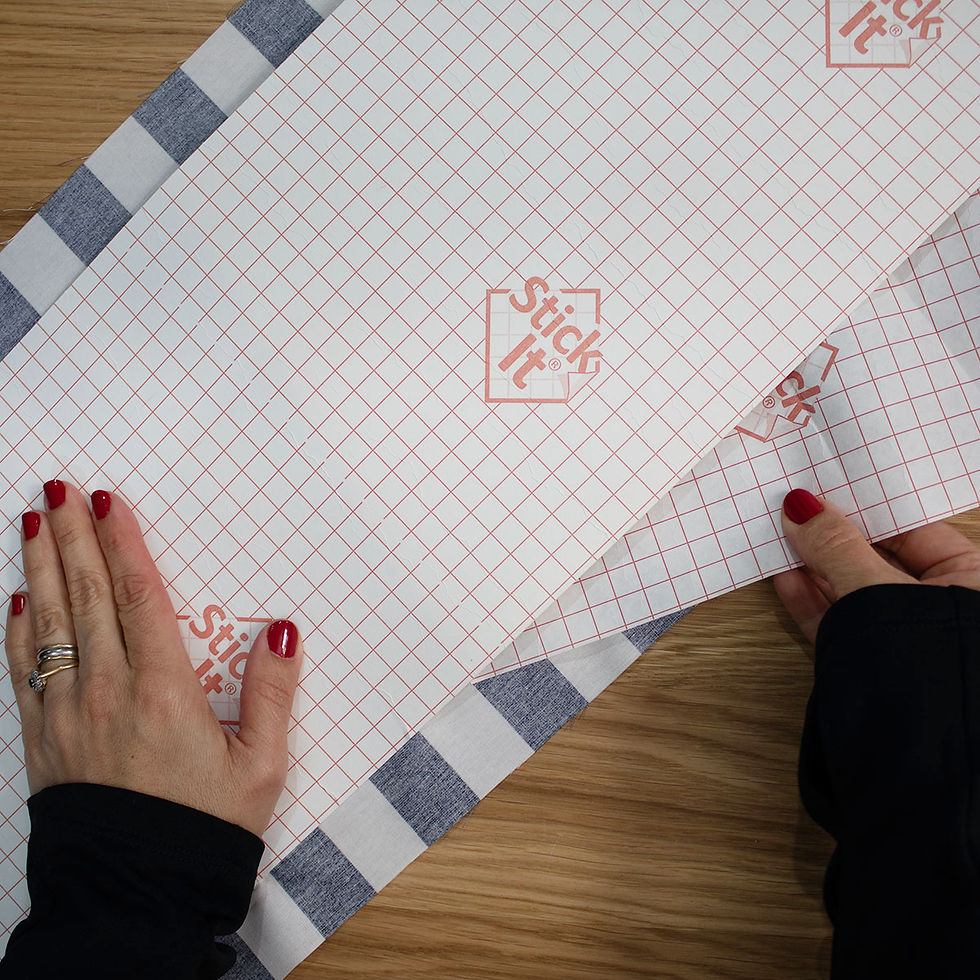
1 x Double-sided Self Adhesive Panel for 25cm diameter drum shade
1 x ShadeCore ™ 25cm Drum Lampshade Ringset (utility and plain lampshade rings)
1 x Self Adhesive PVC (Rolled Edge) Strip 1000mm x 15mm roll
Other Materials and Tools:
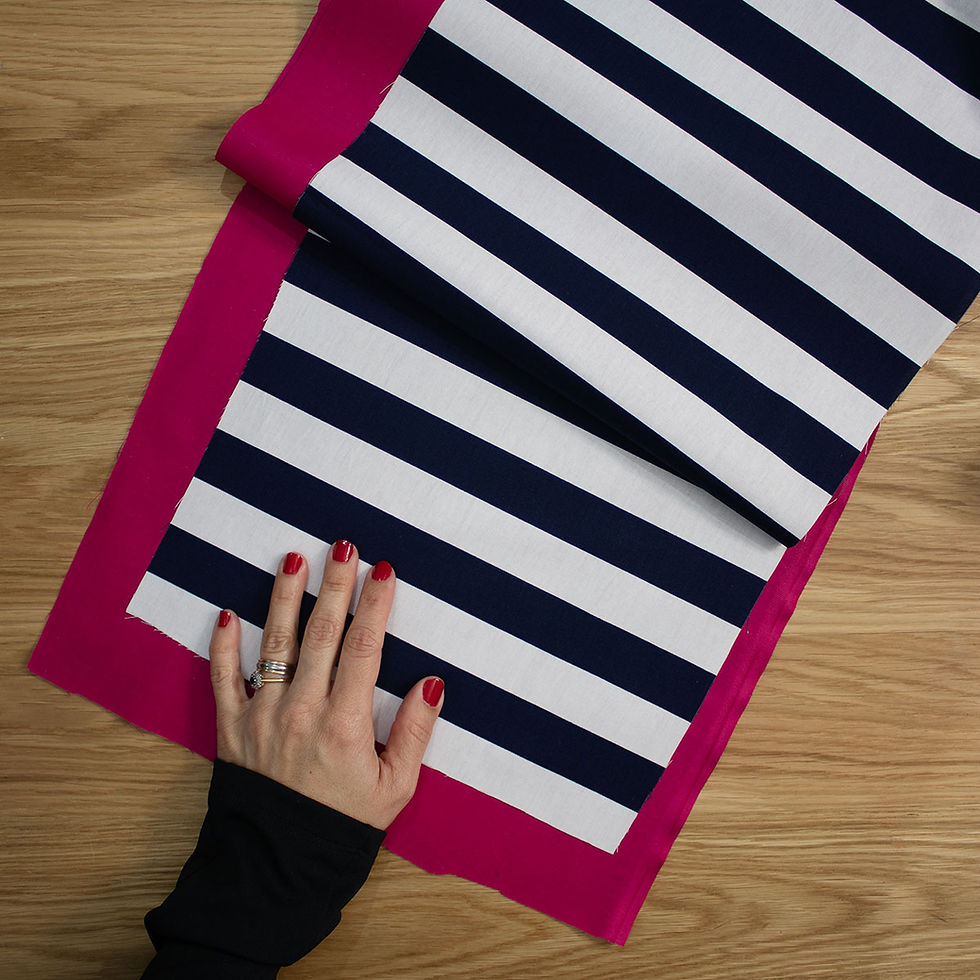
Inner and outer lampshade coverings (see notes below) - we used our Cordoba Plain Cotton in Cerise
Seam Roller (optional)
Household scissor (for cutting tape)
Iron and ironing board
Notes on coverings
You can use woven fabrics, paper or wallpaper to make a double-sided lampshade, but consider these tips when choosing your coverings:
Consider the direction and scale of your fabric to ensure it will fit into the depth of the lampshade panel
If using a wallpaper, make sure the width of the roll will fit onto the panel. To join wallpaper rolls together horizontally, take a look at our Making a wallpaper lampshade blog post.
As noted in the tutorial , when using directional fabric or wallpaper for the the inner and outer covering, you will need to make sure these run in the same direction!
How to make a Double-sided Lampshade
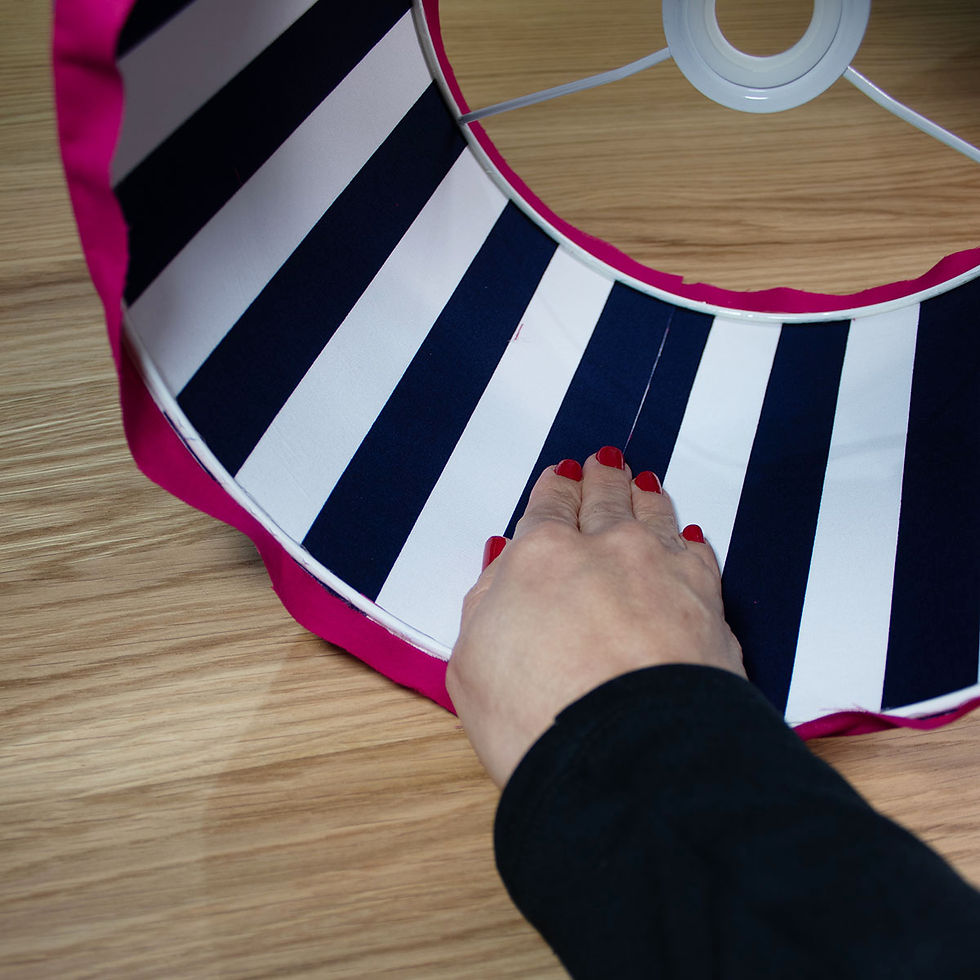
1. Cut down your pre-ironed coverings to a workable size, ideally 5cm bigger (all round) then your self-adhesive panel.
2. Place the inside fabric or wallpaper face down, then place the self-adhesive panel on top and check the position. Remove the release paper and stick the panel down onto the covering.


3. Keep removing the release paper gradually and smoothing the self-adhesive panel down onto the covering.
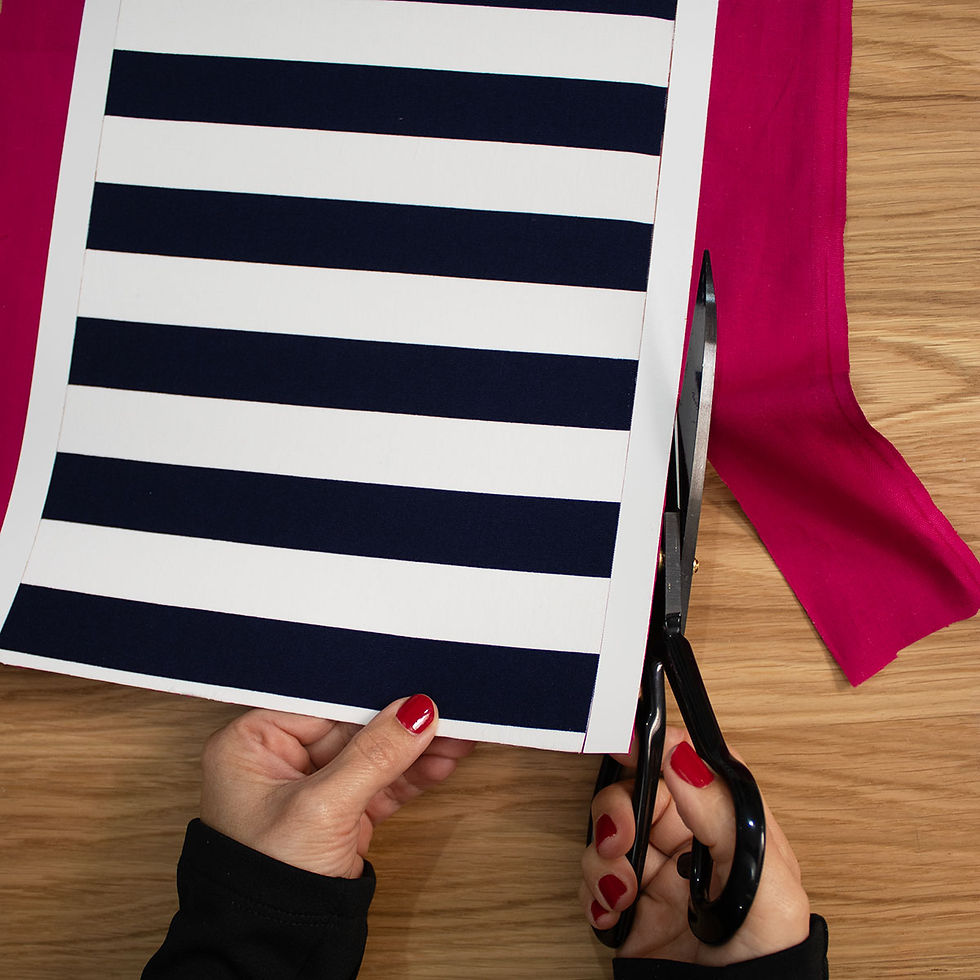
4. When complete, trim surplus covering from all the panel edges using scissors or a sharp knife.

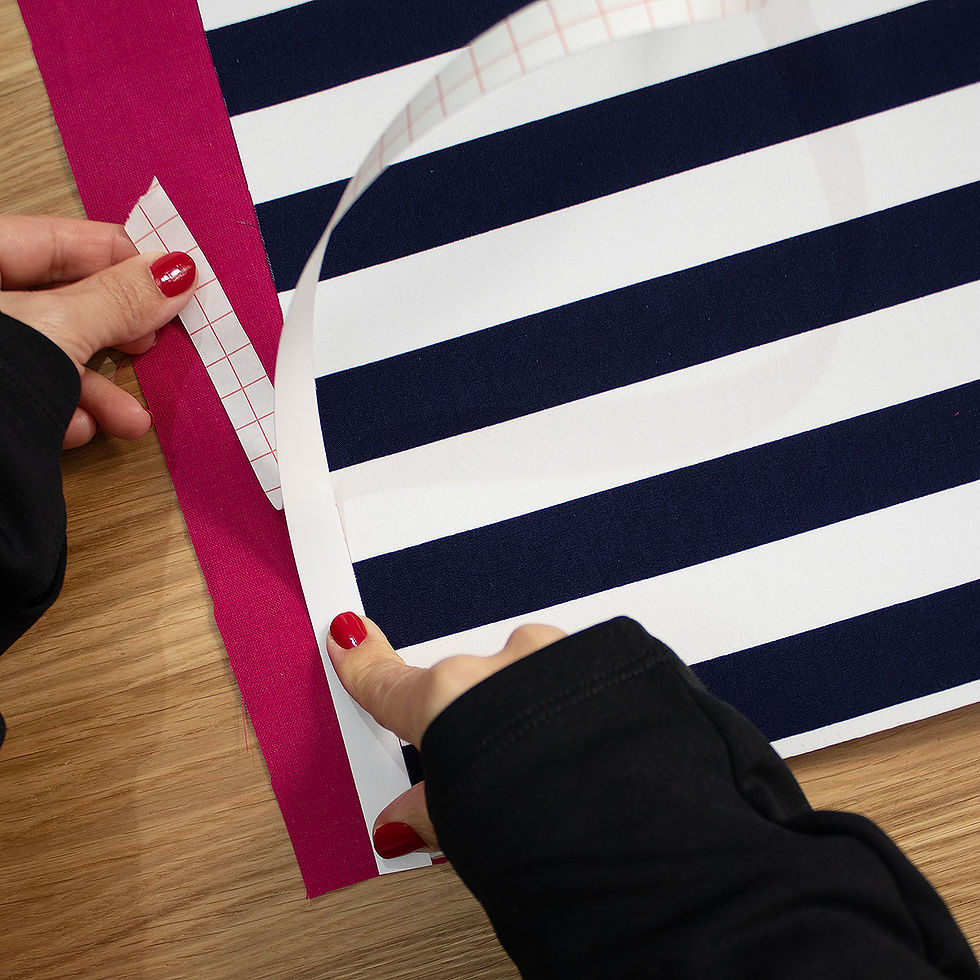
5. Place the outside covering face down and put the panel on top, self-adhesive side down. Remove the release paper and stick the panel down onto the outside covering.
Tip! If your inner and outer coverings are directional, make sure that they are both running on the same direction.

6. Keep removing the release paper gradually and smoothing the self-adhesive panel down.

7. Remove 2cm of the Self-Adhesive PVC Strip and butt the strip next to the long panel edges.
8. Cut the strip at the end of the panel and then apply to the other side of the panel.

9. Trim surplus covering from along the edge of the strip using scissors or a sharp knife.
Tip: A clean cut stops fraying and helps with finishing.
10. To avoid fraying carefully remove the strips of PVC to leave the precise amount of outer covering for finishing.

11. Apply double-sided tape to one side of the PVC edge of the panel, for securing the seam. Remove the release paper and your panel is now complete and ready for attaching to the frame.

12. Apply double-sided tape to rings, press evenly and firmly onto the wire.


13. Remove the release paper, you now have two sticky rings to fix to the panel.

Positioning your rings for directional coverings
If your inner or outer covering is directional you need to think about the position of the rings at the top or bottom of the panel.

14. Place the rings on the inside coverings edge and start to roll towards the seam edge.

15. Keep in line with the inner covering edge at all times. If you run off the edge, go back and correct.

16. Once started, roll the lampshade towards you, and you get a clear view of alignment of the rings and inner panel.

17. When you get to the seam (the overlap), press together from the centre out.

18. Turn over so the seam is now on a hard surface and apply firm pressure pressing the tape down with your hand or use a seam roller.

19. Cut away a small square of the covering overlap at the top and bottom of the seam edge.

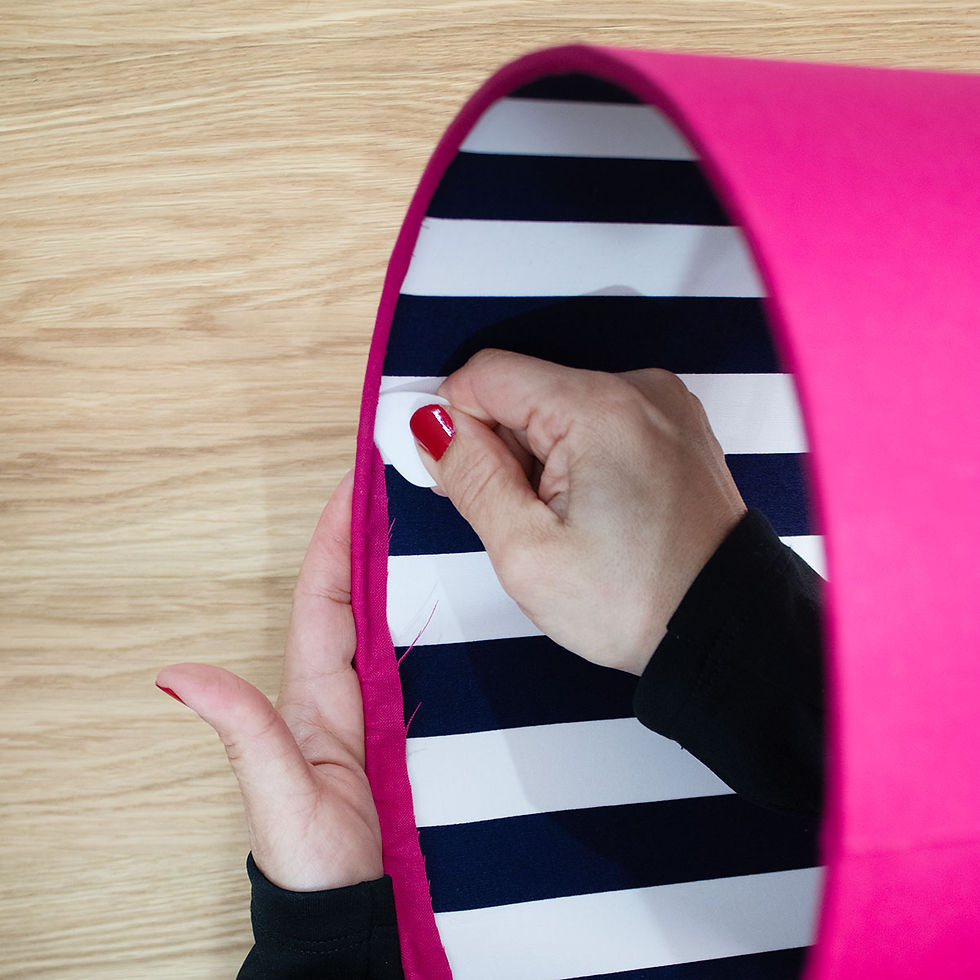
20. Pinch the fabric, pull taut and fold the covering edge onto the sticky rings.

21. Snip and fold in the covering behind the struts on the utility rings.


22. Use the finishing tool to push the covering behind the ring.
Tip: Push the tool between the gap and swipe around the circumference until you’re happy with the finish.
Enjoy your professionally finished double-sided lampshade!


More Tips and Tricks
Read out blog post Seeing Double - Double-Sided Lampshade Making, for tips and tricks from our expert makers along with more product details.

Seeing Double
It seems our lampshade makers love a double-sided lampshade, and here are some inspirational examples, to whet your lampshade making appetite!

Silhouette Effect
The bonus of a making double sided lampshade is not just using two beautiful fabrics, but the silhouette effect that can be created when the light switches on and the interior fabric shines through.
This is best achieved with fabrics rather than wallpaper, and usually a plain outer fabric and a patterned fabric on the inner lampshade, although there are no rules around using patterned fabric on both. The lighter the outer fabric in terms of colour the stronger the effect will be, as demonstrated below.
Read more about this unique feature of double-sided lampshade in our blog post, Lampshade Style Guide.


Hi, thank you for sharing. What is the finishing tool you're using at the end of this tutorial to tuck the fabric in under the ring?